Search Knowledge Base by Keyword
How To Import & Export Your Environment
Thanks to UKHost4u Cloud Platform you can easily and within a few clicks import or export any environment. You’ll find below a quick outline of this article to navigate faster across our sections:
Environment Import
UKHost4u’s Environment Import feature will allow you to execute .json, .jps, .yml, .yaml, or .cs files on the platform to automatically install and configure your projects according to the declared settings.
At first, it was designed to deploy the previously exported environment copies and transfer an application from another UKHost4u installation for example.
But you can also use it to install your own solutions, declare via JSON, or integrate any ready-to-go packages from Jelastic JPS Collection.
We’ll show you in this article how to work with the UKhost4u import functionality.
1. Click on the Import button at the top of the dashboard.

2. Within the opened Import window, you’ll see three tabs with different options for providing the required file:
- Local File: Select a locally stored manifest simply by clicking on the Browse button.
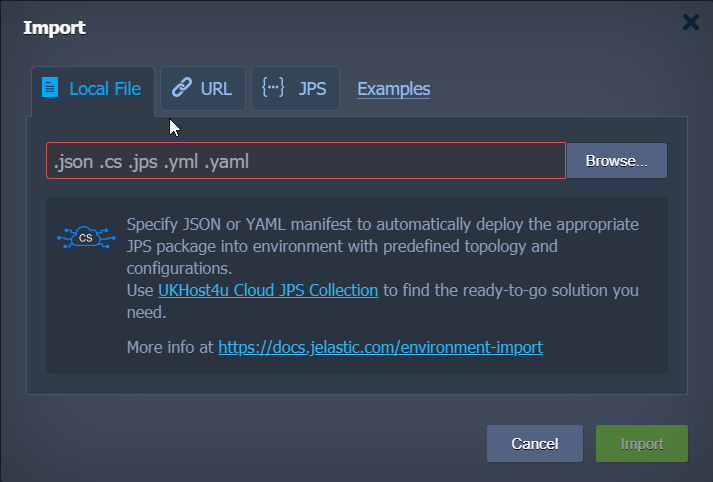
- URL: to type in or paste a direct link to the required file.

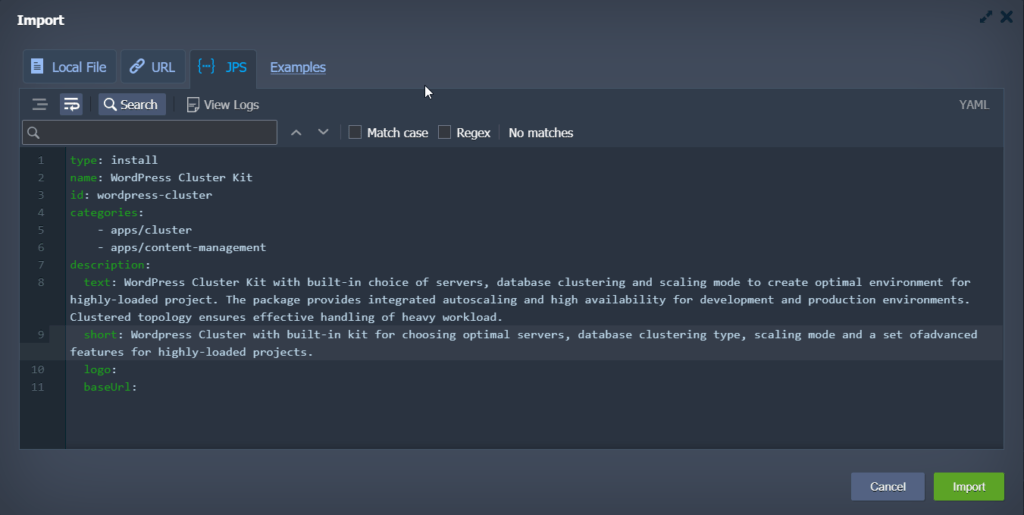
- JPS: the built-in editor to either insert and edit code or compose your own solution from scratch.
Please refer to the JPS deployment and troubleshooting section below for more information.
PLEASE NOTE: The Examples link next to these tabs redirects to the JPS Collection at GitHub, which stores multiple open-source samples of the ready-to-go packages. You can import any of them by fetching manifest.jps via the tabs above or examining files and scripts to create your own solution.
Proceed by clicking on the Import button in the bottom-right corner of the needed import type tab.
3. You’ll see the installation confirmation window with the corresponding package description. For the exported environment, it shows details on the source platform and export date.
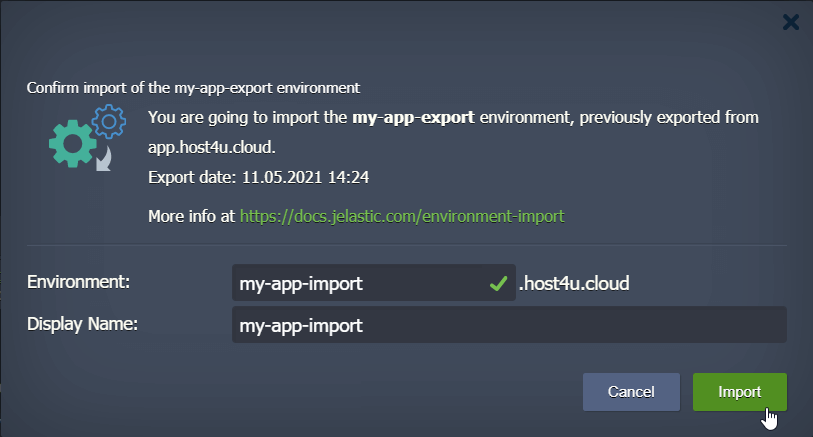
Within the fields inside, you need to specify the following parameters:
- Environment: the domain name for your new environment
- Display Name: environment alias to be displayed at the dashboard instead of its domain (optional)
Click Import when ready.
4. Your environment creation, deployment, and configuration is in process and should take a few minutes only.

PLEASE NOTE: feel free to minimize this window and continue working with the dashboard without interrupting the importing process, which will proceed in the background.
5. Once completed, the installation success window will be displayed.
Click Open in Browser to immediately check the result or Close if you wish to come back to your dashboard.
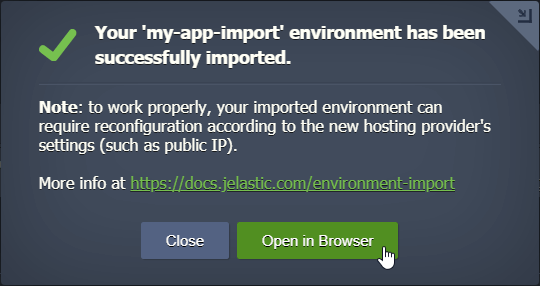
Furthermore, you can check your email for information like hostname, and new administrator credentials for the nodes on your imported environment.
That’s it! Now you know how to install any required solution to the chosen platform just in a few clicks, without needing to set up all configurations manually.
JPS Deployment & Troubleshooting
The Import -> JPS option is the most frequently used by developers who create JPS packages for automation of common tasks or implementation of complex CI/CD flows for example. Also, it is an excellent tool for the quick tuning and testing of the packages.
1. Once added to the editor panel, your code will be automatically parsed for errors.
Which will be marked with the red cross icon before the corresponding line if detected. You can hover over for additional information on the issue.
PLEASE NOTE: Your code is safely retained in your browser’s local storage, so you can freely close the whole Import frame and return to coding later on.

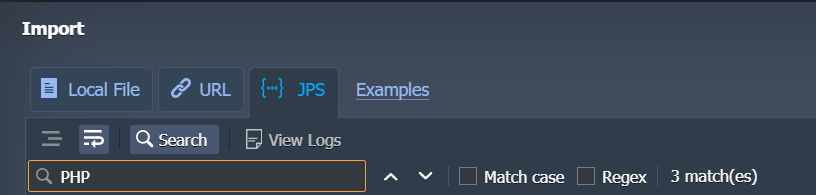
2. At the top of the window, you’ll find several tools to help you code more conveniently:
- Format JSON: automatically sets proper indentation and line feeds (not available for YAML).
- Wrap line: breaks lines when they reach a frame border.
- Search: locates the needed information, with additional options to narrow the search results even further:
- Match case enables a case-sensitive search.
- Regex uses regular expressions for the search conditions specification.
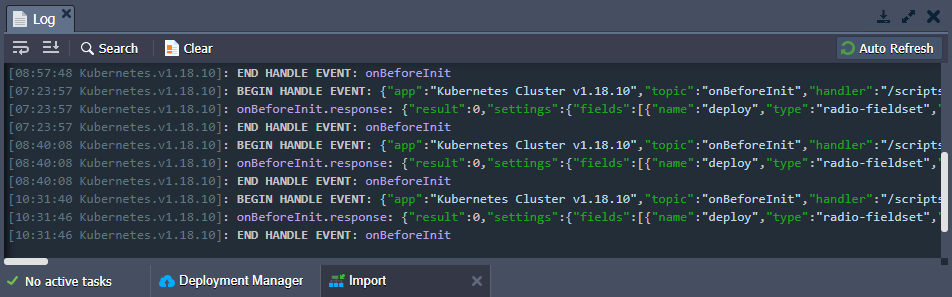
- View Logs: Open a console to track your code execution.
3. The Import logs provide essential information for troubleshooting. If you face issues during the JPS packages creation, refer to this Import -> JPS -> View Logs tab and search for errors.
Environment Export
To prove our Cloud Platform is truly flexible and holds no constraints, UKhost4u allows you to easily manage your environments. This procedure consists of 2 main stages:
- The Export of the existing environment.
- The Import to the target installation.
Both of these operations will take just a few minutes. In the end, you’ll receive an identical ready-to-work copy of your environment being run within another installation.
How to Get an Environment Copy?
During an environment export, all information such as its topology settings deployed applications, links to the archives with configurations, and private data it contains are packed into a single .json file. This compact JSON package can be easily downloaded to your local computer for storage.
To export a copy of your environment, log into your UKHost4u Cloud Platform account and:
- Select the Settings button for the environment you would like to export (named my-app-export here below).
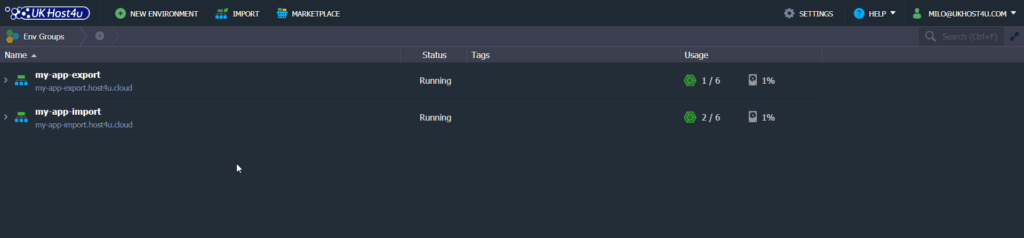
PLEASE NOTE: that environment should have the Running status for being exported.
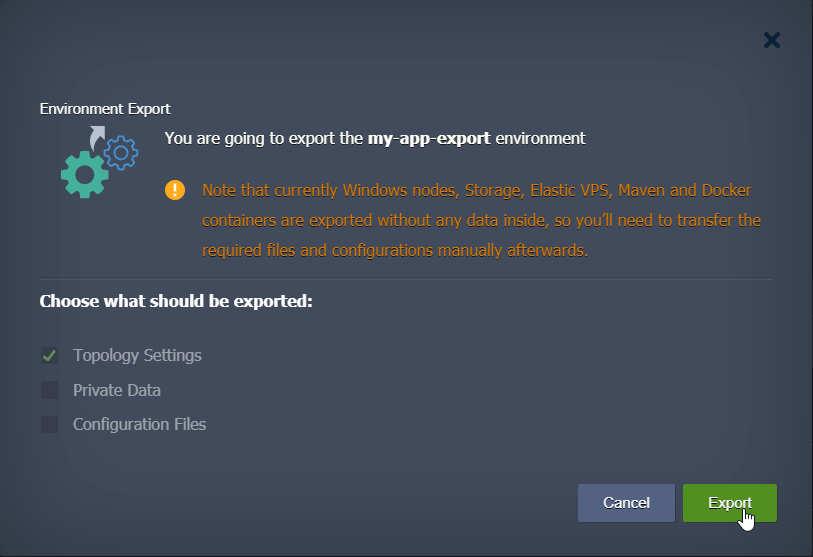
2. In the opened Settings tab, navigate to the Export section and click on the Export button.

A dialog box will appear so you can choose which data should be exported. If you want to download the identical environment copy tick all options:
- Topology Settings: environment configurations you’ve sat through the Environment topology wizard.
- Private Data: files in directories of your deployed application(s) and private data stored within your database server(s).
- Configuration Files: all files, accessible via Configuration Manager at your dashboard, and settings of the deployed GIT/SVN projects such as repositories links, access credentials, attached private SSH keys, etc.
PLEASE NOTE: To ensure your application and data safety, we highly recommend not to delete the original of the exported environment until its copy is successfully imported to another platform.
3. Once the required for export data is defined, click the Export button to proceed.
PLEASE NOTE: Depending on the type of containers your environment contains, keep in mind the following points:
- Data from Elastic VPS, Maven, Docker, and Windows-based containers won’t be exported, though they will be still included in the topology of your imported environment, so you’ll be able to reconfigure these servers manually afterward.
- When exporting an NGINX server (of both load balancer or application server node types), the appropriate node will be briefly stopped and automatically started again to fetch a server dump.
- The private SSH key, exported alongside the rest of the GIT repository settings, can’t be deleted from the imported environment and is not shown in the dashboard, though it will still be used for the connection. Nevertheless, it will be substituted if choosing a new one within the GIT project’s settings window
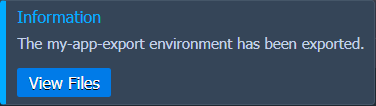
4. Once the export is successfully finished, a new clickable string (named due to the export time/date) will appear in the Exported Environment Copies list. Select it to download the compiled .json file with exported environment data to your local machine, or just right-click on it to copy the direct URL to this manifest (which can be also used during import).
In addition, you should receive the appropriate email notification with link to the list of your exported environments.
Keep in mind that you can create as many exported environments’ archives as you need, however they will be stored in your disc space. If you no longer need a particular file, feel free to delete it by clicking the red cross button right before the corresponding string.
That’s all! You have successfully exported your environment copy. Now, you can proceed to its importing to the target platform in order to complete the migration.
Need help?
You have a question, do you need our assistance? Please contact our 24/7 support team available via our ticket system or via our live chat.
