Search Knowledge Base by Keyword
Java Developer’s Centre
UKHost4u being a multilingual platform still, primarily focuses on Java. After reading this guide you will be fully acquainted with the unique features of Java hosting with the UKHost4u platform. You can conveniently start with a wide functionality list.
You will find this information in the guide below;
- Versions of Java
- Java Application Servers
- Environment Creation With Java
- Java Application Deployment
- Domains Management
- Automatic Vertical Scaling
- Manual and Automatic Horizontal Scaling
- Database Connection to Java Application.
1. Versions Of Java
UKHost4u supports the below-mentioned versions of Java at the time of writing this document;
- AdoptOpenJDK: 8.0_312, 11.0.13, 16.0.2
- Amazon Corretto: 8.312.07.1, 11.0.13.8.1, 15.0.2.7.1, 16.0.2.7.1
- Eclipse OpenJ9: 0.27.0-16.0.2, 0.29.0-11.0.13, 0.29.0-8u312-607
- Eclipse Temurin: 8.0_312, 11.0.13, 17.0.1
- Liberica JDK: 8.0_302, 11.0.12, 16, 17
- Oracle JDV Dev: 8.0_202, 11.0.2
- Oracle OpenJDK: 8.0_312, 11.0.13, 17.0.1, 18.ea-b31
- Zulu Community: 8.0_312, 11.0.13, 13.0.9, 15.0.5, 17
You can choose the desired version during the creation of an environment, or modify it later.
2. Java Application Servers
UKHost4u supports a real Java engine and the below-mentioned application servers;
- Tomcat
- TomEE+
- Jenkins
- Jetty
- Payara
- Spring Boot
- WidlFly
- GlassFish
3. Environment Creation With Java
It is important to create an environment to host the Java application. For that, just launch the Environment Topology wizard from your UKHost4u interface, click on the Java programming language tab, select the preferred Java application server, databases, and other software stacks. Make other settings such as cloudlets, disk space, etc according to your requirement and then click on the Create environment tab.
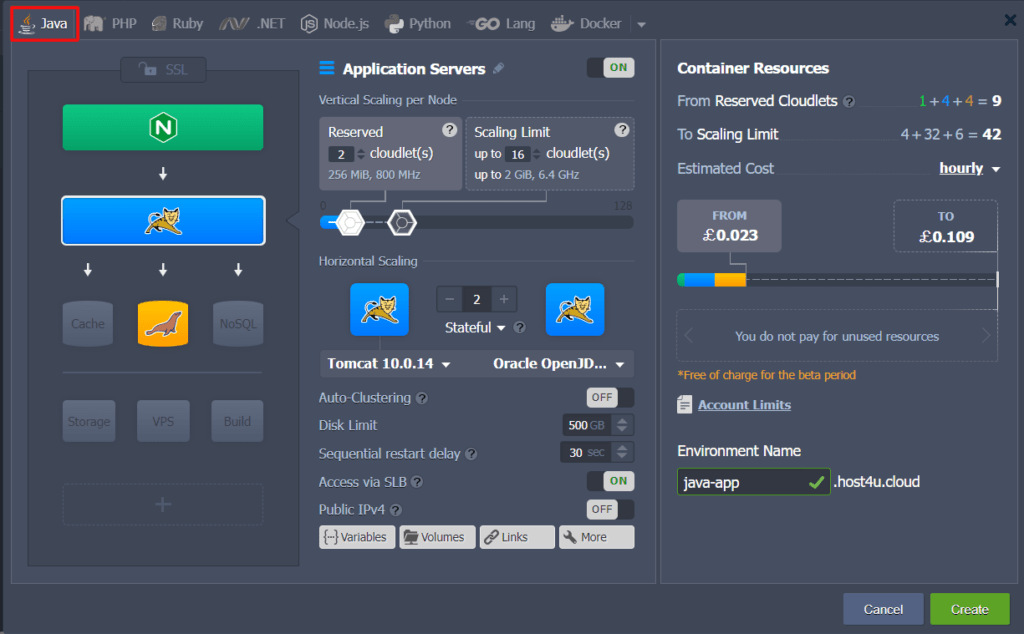
The added servers indicate entirely isolated containers, present on separate hosts for more availability, while isolation rules out the risk of interrupting each other. To access any of the servers directly, attach the public IP address to it. If not, then the incoming requests sent to the user’s application will be represented by Shared Load Balancers.
4. Java Application Deployment
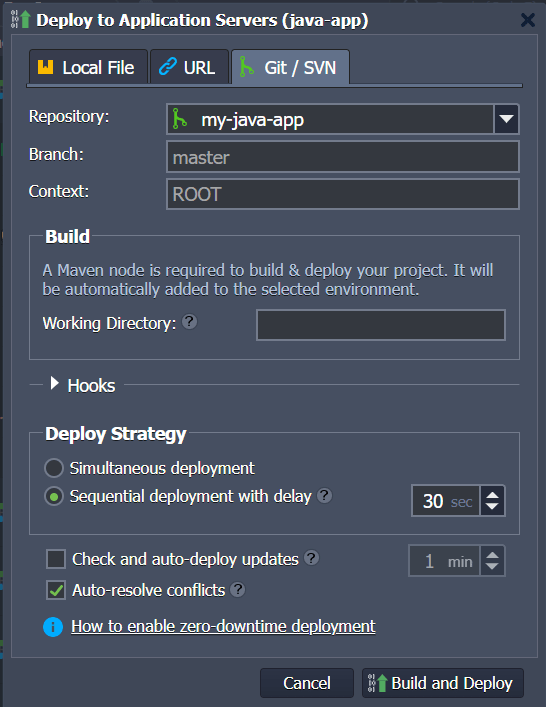
You can deploy your Java application once the environment is created. UKHost4u wholly mechanizes the process of deployment letting you speed up the project effortlessly.
These deployment methods are supported by the platform;
- Through application archive: .war, .ear, .zip archives
- GIT/SVN remote repository: with the help of Maven build node
- Via plugins: Ant Task, Maven, Eclipse, etc.
5. Domains Management
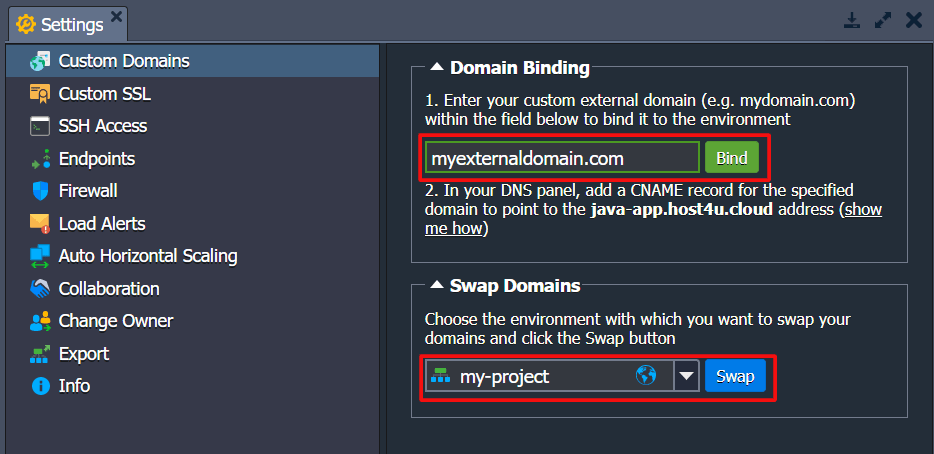
Instead of using the default environment name, you can bind a custom domain name to the URL of your application:
- CNAME redirect: is advised for dev and test environments if utilizing Shared Load Balancer.
- DNS A Record: helps in handling high traffic and is appropriate for production environments is utilizing public IP.
You can update and modify your application with zero downtime, by using the swapping domains feature.
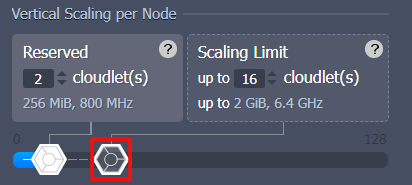
6. Automatic Vertical Scaling
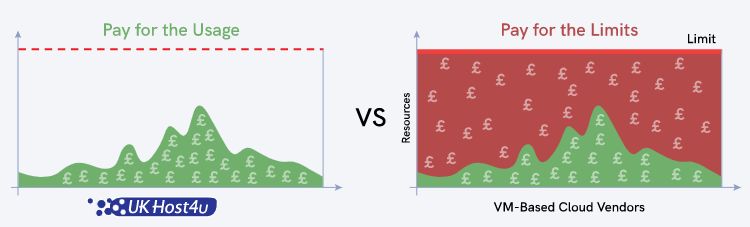
The UKHost4u platform often gives the number of cloudlets in the form of RAM and CPU resources that your application requires for managing the current load. Just mention the highest limit, rest will be attempted by the platform by default without any manual interruption. This feature is known as Automatic Vertical Scaling and makes sure that you never have to pay for the unused resources. It also ensures that you don’t face any resource shortage.
Use the suitable toggle slider in the Topology wizard to set or modify the vertical scaling limit.
7. Manual And Automatic Horizontal Scaling
You can freely scale your application horizontally in case a single node is not sufficient due to your application’s popularity. To make sure that there is more reliability and high availability, all the newly added nodes are made on distinctive hardware nodes.
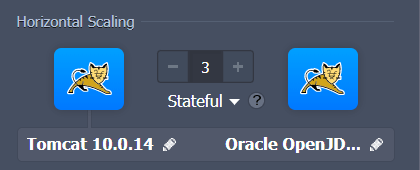
To set the required number of nodes, use the + or – button in the Horizontal scaling section of the wizard. The load balancer will be added by default. You can also adjust the desired scaling mode.
- Stateful: copies the file system of the primary container into new nodes sequentially.
- Stateless: Uses the base image template to create all the new nodes
Horizontal scaling can be attempted automatically and not just manually depending on the current load of the node. The load is checked through the tunable triggers.
Go to the Settings, then click on the Auto-Horizontal scaling section. Here you can set the scaling conditions because of your requirements, i.e., lower or upper limit for the particular resource type during a specific period. The load’s addition or removal procedure will be done automatically in case the load doesn’t come inside the set limits.
Triggers keep a check on the following types of resources;
- CPU:
- Memory (RAM):
- Network:
- Disk I/O:
- Disk IOPS:

The trigger begins monitoring the resource utilization as soon as it is added.
