Search Knowledge Base by Keyword
Memcached Caching System Guide
Memcached is a basic, liberal and open-source, highly efficient, shared memory object caching system. It is made for boosting the speed of dynamic web applications by lessening the database load.
To put in other words, it is your applications’ short-term memory.
Memcached APIs give an enormous hash table shared over several machines. After the table is filled, the succeeding inserts lead past data to be deleted in the least recently used order. Applications working with Memcached typically add requests and additions to RAM before getting back to a slow-moving backing store, for instance, a database.
You can make better use of your memory with the help of Memcached.
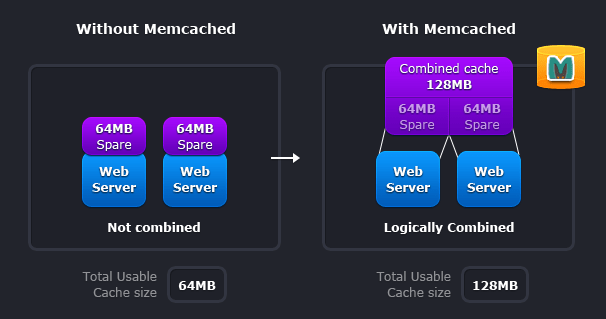
Two deployment instances are represented given by schemes;
– Without Memcached: each node is entirely independent in this case.
– With Memcached: each node can utilise memory from other nodes in this case.
The former case, explains the exemplary deployment strategy, you will observe that it is both useless such that the total cache size is a part of the actual efficiency of your web farm, but also in the terms of required effort to keep the cache unvarying among all of those nodes.
In the latter case, you will observe that all of the servers are considering the same virtual bundle of memory. This implies that a given item is always saved and always fetched from the same place in your whole web cluster.
Furthermore, when the demand for your application goes up to a spot where you call to have additional servers, it usually grows in the terms of data that can be frequently accessed. It is better to have a deployment strategy where these two systems can scale in accordance with each other.
Simply, follow the steps to get Memcached in your environment;
1. Log in to your UKHost4u interface using the credentials.
2. Click on the create Environment or New environment tab.
3. In the Topology wizard, choose your preferred application server such as Tomcat, etc.
4. Enable the Memcached tab.
5. Now, scale it vertically.
6. After that, give a name to your environment such as memcached, etc.
7. Finally, click on the Create button and wait for the environment creation.
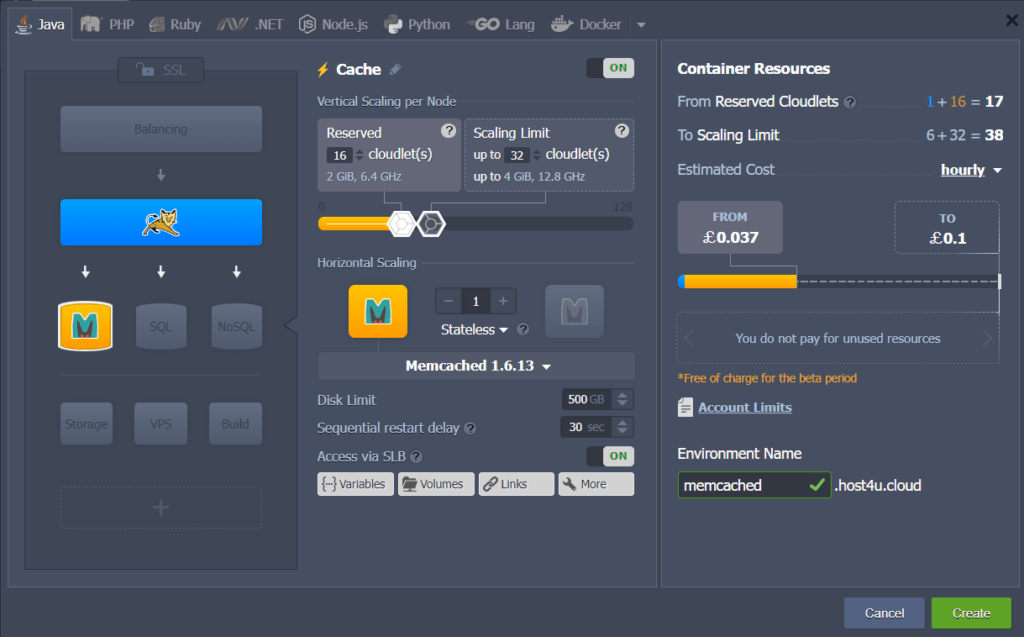
Finally, Memcached is now available in your dashboard.

