Search Knowledge Base by Keyword
Understanding Cloud Dashboard
In this guide, you will have an understanding of the UKHost4u dashboard usage and will help you to know the served possibilities.
Here’s what you will be learning in this section;
- Environment Creation and Management
- Function tabs for environment
- Environment settings
- Function icons for each case
- Import
- Marketplace
- Environment Groups
- Searching the Dashboard
- Deployment Manager
- Tasks Section
- User Settings
- Help and Account
1. Environment Creation and Management
– Click New Environment in the top-left corner of the UKHost4u dashboard.

– You will see the Topology tab, where you can manage the environment settings according to your preference.
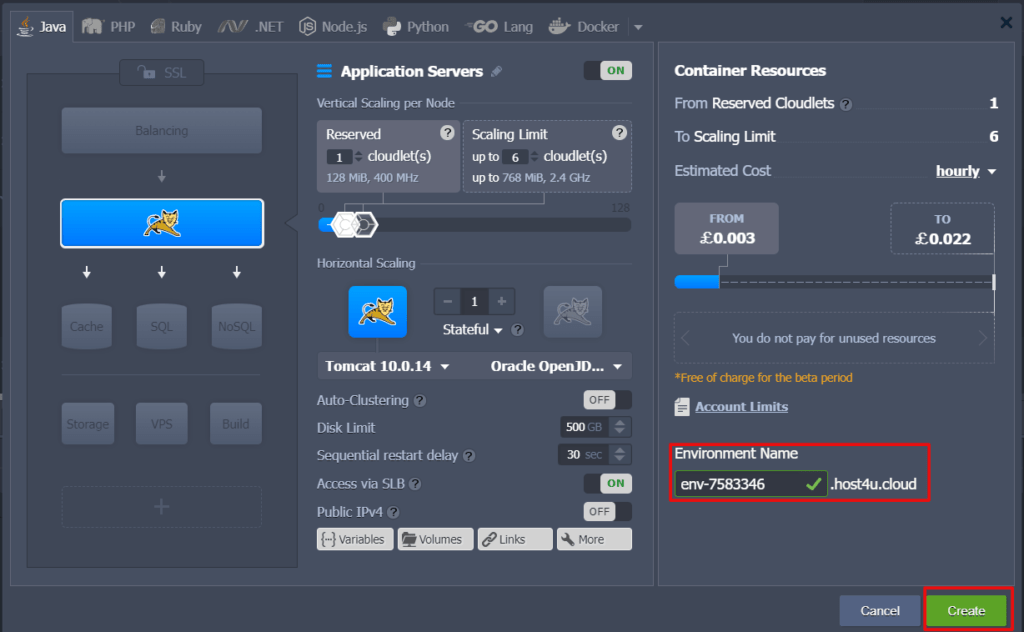
Here, enter the name of your environment and click on the create tab as shown.
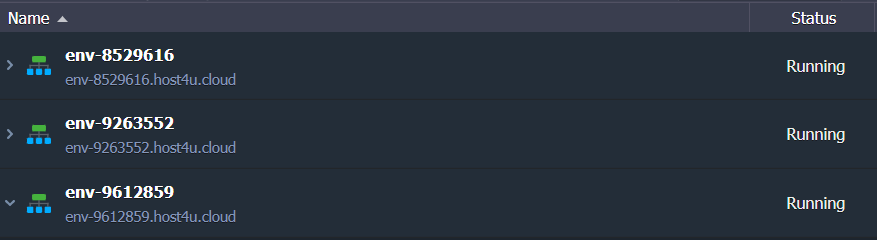
– In the central panel of the dashboard, you will see all your environments.
2. Function Tabs for Environment
Go on a running environment’s name to see (see image below) multiple icons for its configuration and management.
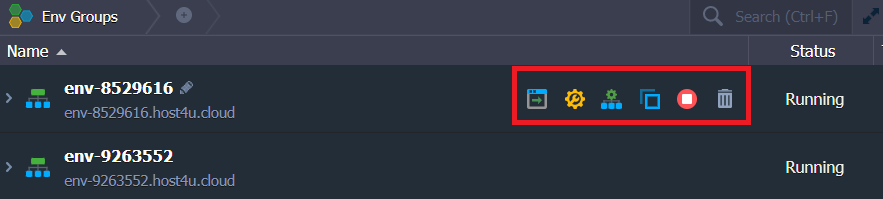
- Click on the ‘Set Alias’
 option to rename the environment.
 - Click on the ‘Open in Browser’
 option to open the environment in a new browser tab.
 - Now, use the ‘Settings’ tab to launch a separate tab with several configuration panels.
- Modify the Environment Topology by selecting the
 option. Attempt the necessary changes in the displayed Topology Wizard box. Click on the Apply button to submit them.
 - Click on the button to clone the environment. On the displayed frame, choose a name for the new environment and then press the Clone tab.
- To modify the environment status you have Start
 and Stop buttons.
 - Click on this
 icon if you want to delete the environment.
- Scroll over the tags column to handle the groups of this environment. You can Add/Edit the groups by using these two tabs,
 and
and  .
.
3. Environment Settings
In the environment settings tab, you have 11 options;
1.Click on the custom domain to have access to these suboptions
- Domain binding
- Swap domains
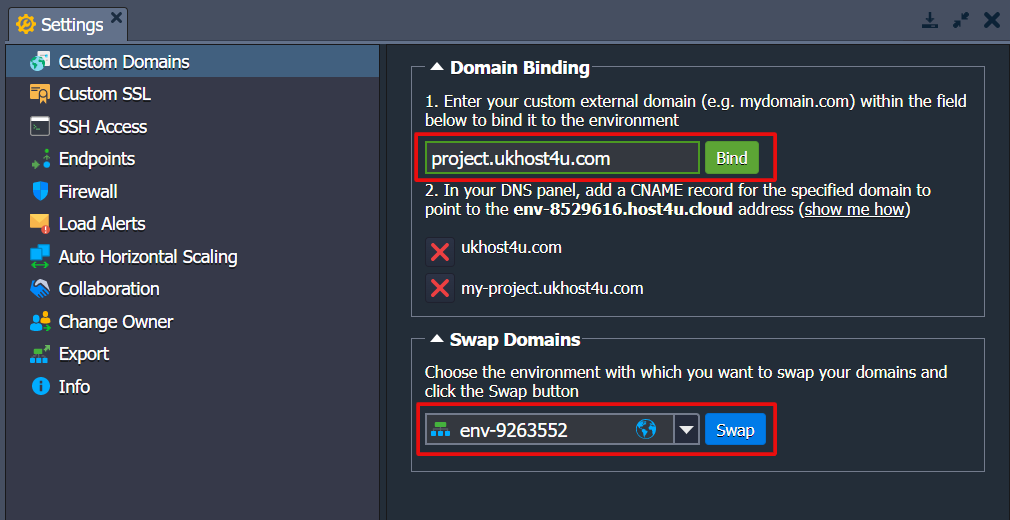
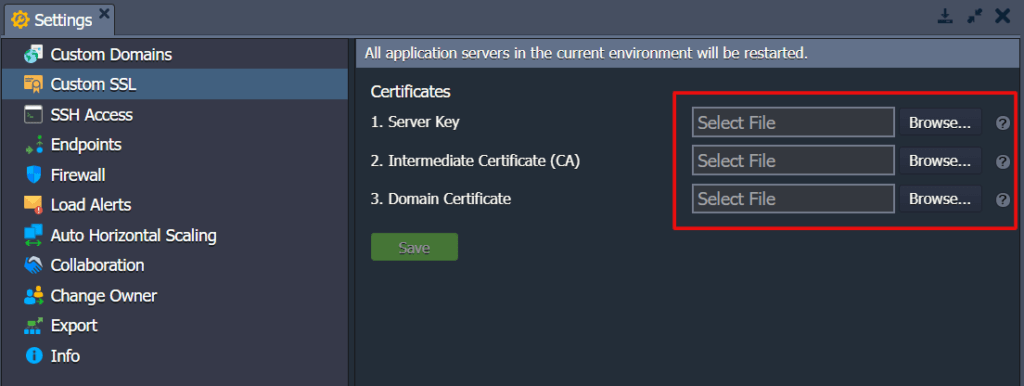
2. Select the Custom SSL option and upload the most required file to apply your Custom SSL certificate.
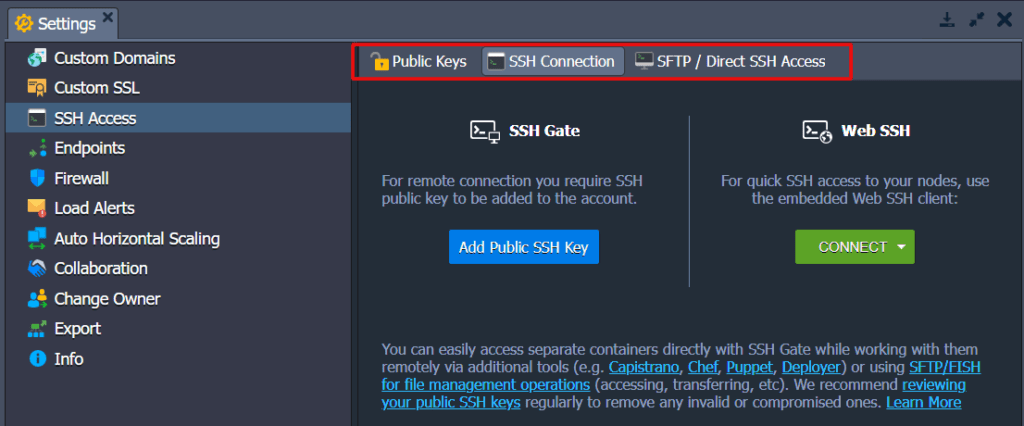
3. In the SSH column, you will observe the tabs Public keys, SSH Connection, SHTP/Direct Access tabs.
- Under the first tab, you can manage your public SSH keys.
- The second tab allows you to access your environment using SSH gate or web SSH.
- The third tab will give you details regarding the connection over SFTP/FISH protocols.
4. In the Endpoints section, you can handle the mapping of your containers’ TCP/UDP ports to be sure of their interaction with external resources using a direct connection.

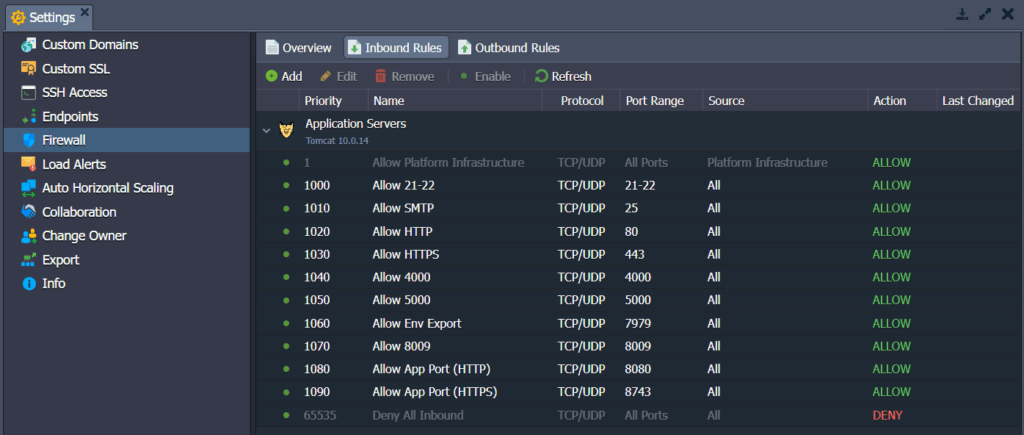
5. The Firewall settings let you set inbound and outbound rules to give access to your containers. The rules strictly define the connections to be allowed or blocked.
6. Click on Load Alerts to make new triggers or adjust the default triggers to get suitable emails in case the defined resource’s usage run overs the specified limits.
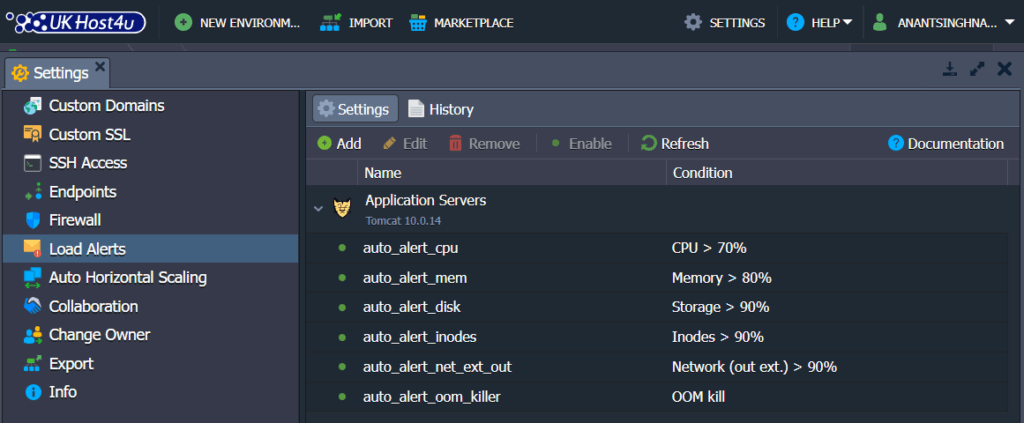
The history tab will show the triggered alerts in the environment along with the details.
7. Using the Auto Horizontal Scaling option, you can construct the triggers to manage the number of containers within a layer. Scaling conditioning can be defined depending on the CPU, memory, network, disk I/O, and Disk IOPS utilisation.
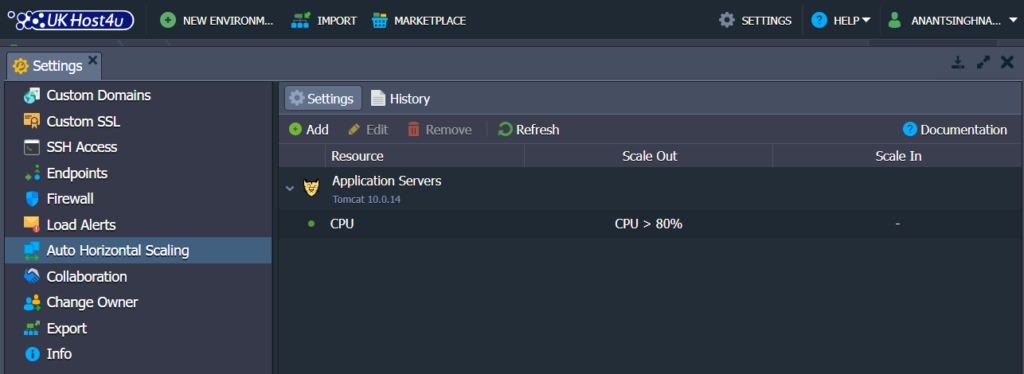
Navigate to the History tab to see to check the list of all scaling functions attempted by the UKHost4u platform due to the configured triggers.
8. Open the Collaboration section to see and manage the list of accounts that can access the current environment.
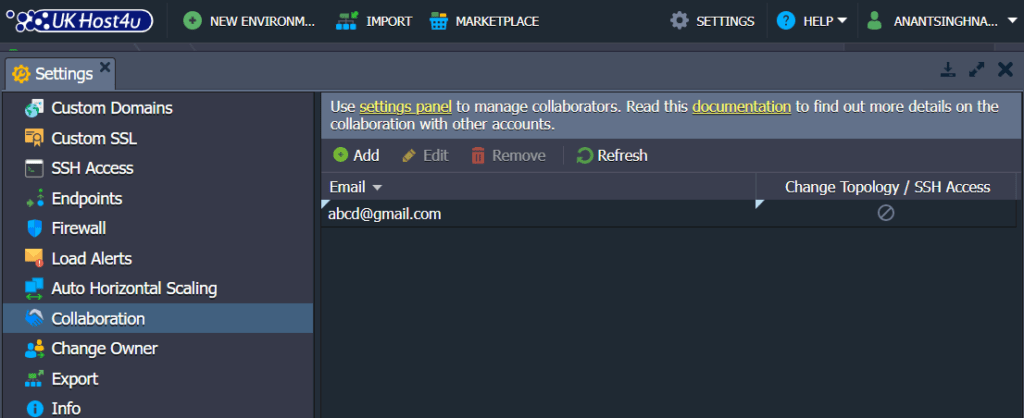
In case you want to grant access to another user then, click on the Add tab and then enter email. To allow the Change Topology/Access Permissions, click on the suitable option. Finally, tap on the Save tab to apply changes.
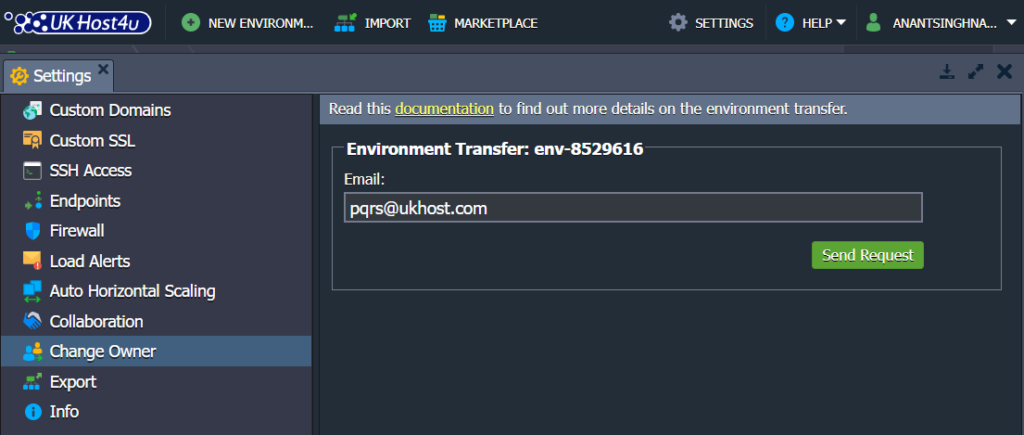
9. Click on the Change Owner option to transfer the environment to another user account within a single platform.
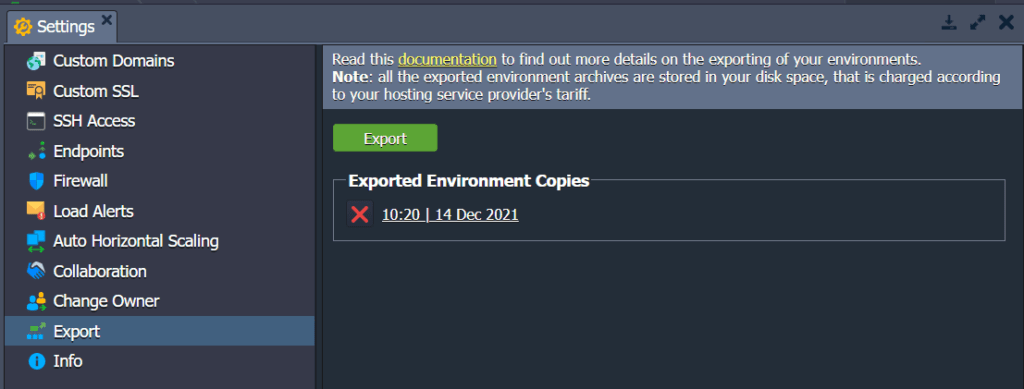
10. Choose the Export tab to compile all your environment’s settings and data into one downloadable file. You can restore it to some other cloud hosting provider’s platform, forming a similar environment copy.
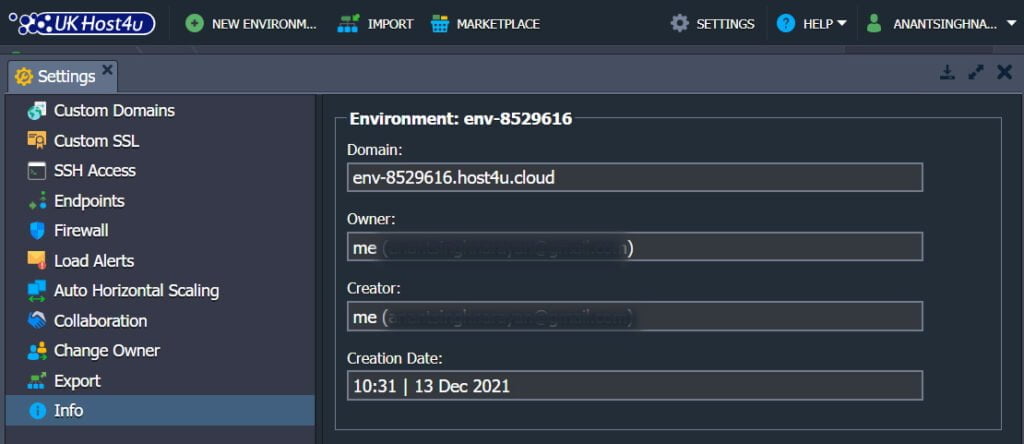
11. Move to the Info menu, to check additional details about the environment domain, mostly its owner and creator.
4. Function Icons For Each Case
Click on the environment in the cloud dashboard to check the list of its sections such as application servers, databases, etc. Click on these sections to further check and manage the different contains, deployed contexts, etc.
Move your cursor over these sessions to check the pop-up icons with different features.
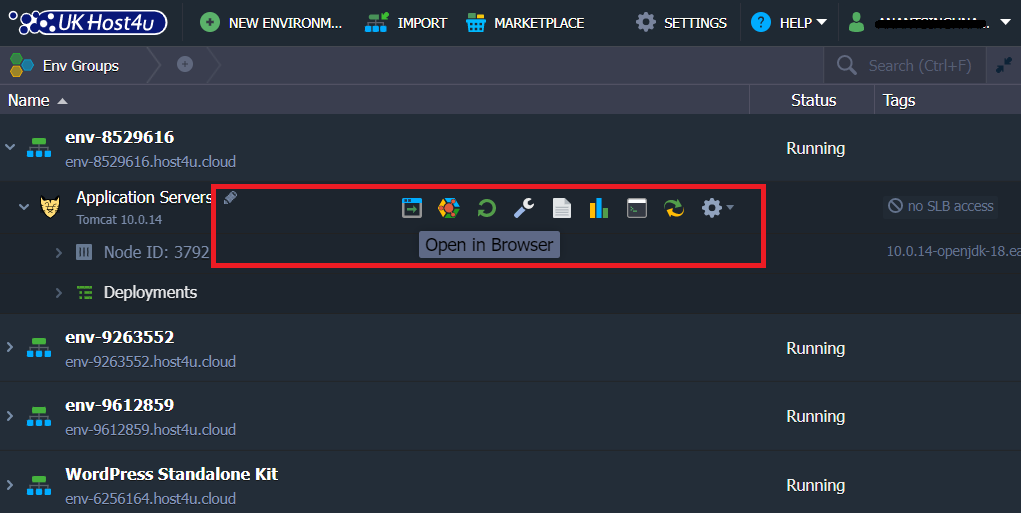
You can use these icons to perform the following functions;
- Set Alias: Set an alternative identity for your layer/node.
- Open in Browser: to open the node of a layer in a new browser tab.
- Restart Node: Select this to restart an appropriate service within a specific container or containers of the layer.
- Confi: Click here to launch the configuration file manager that can manage nodes by setting data, uploading or creating new folders, and modifying or deleting existing ones.
- Log: Click on this option to check the log files for the nodes of the sections. A list of log files based on the chosen case will appear.
- Statistics: To track the real-time data on CPU, network, RAM, Disk space, and IOPS consumption of a separate node or set of nodes.
- Web SSH: Select this option to link to your container over SSH protocol straight in the web browser.
- Redeploy containers: To upgrade the nodes to the desired tag or version.
- Additionally: This option lets you check the container settings.
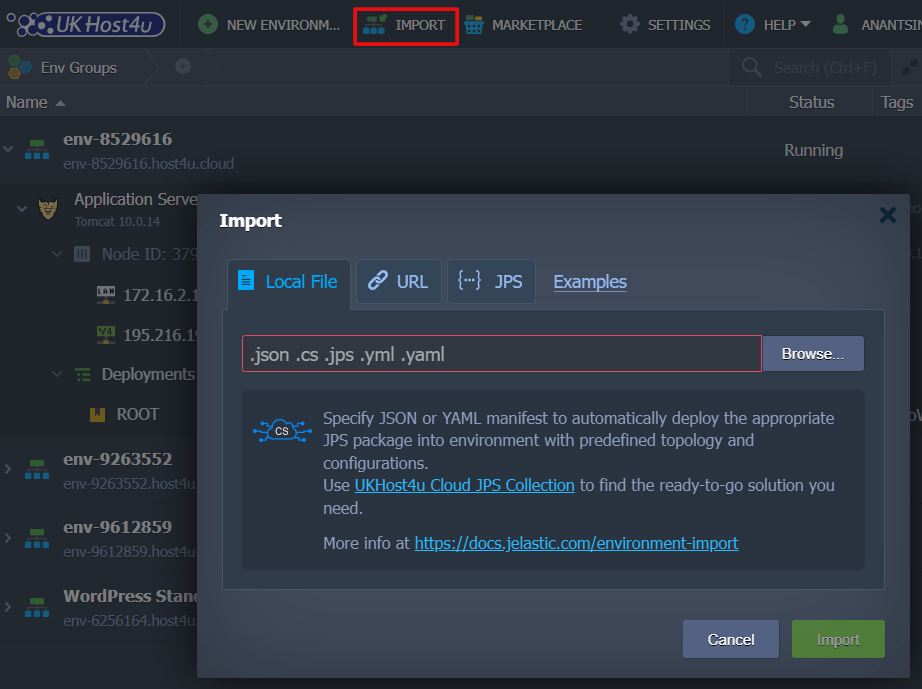
5. Import
You will find the Import tab near the New Environment tab. It manages the uploaded files .json, .jps, .yml, .cs, or .yaml to create a fresh or manage the existing environment depending on the given settings.
Click on the Import tab and you will see these three tabs in the frame;
- Local File: Choose the locally stored file which should be uploaded on the UKHost4u platform and executed thereon.
- URL: Give a direct link to the needed manifest file.
- JPS: you can insert and edit your code before deployment using the in-built JSON/YAML editor. You can also write the package from start.
6. Marketplace
The last option in the upmost bar of the dashboard is Marketplace. Here you will open a separate window that has a list of pre-packaged solutions for automatic installation.

These packages are divided into two parts;
- Applications: For creating new environments.
- Add-Ons: For managing existing environments.
You can also search for the required solution using the search bar or click on the appropriate field in the left-hand menu.
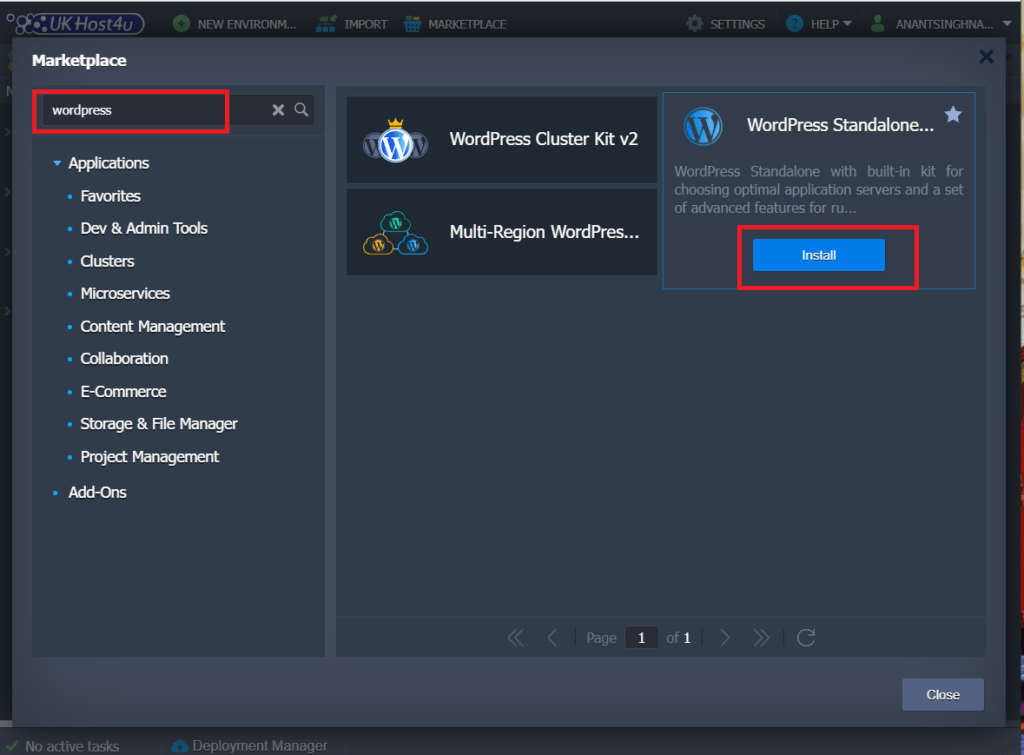
After finding the desired package, click on the Install tab. Now, follow the instructions that display in the installation frame.
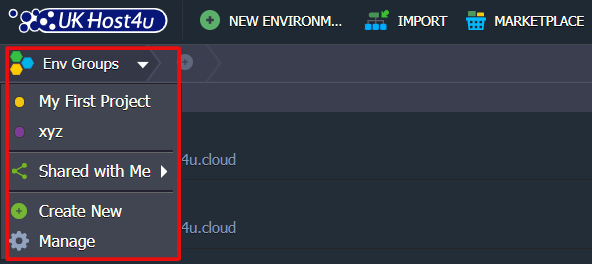
7. Environment Groups
The UKHost4u platform allows you to make Environment groups that will help you to put environments into sections. Like, the handling of various projects becomes easy when they are organised into different groups. You can also create further subgroups if required.
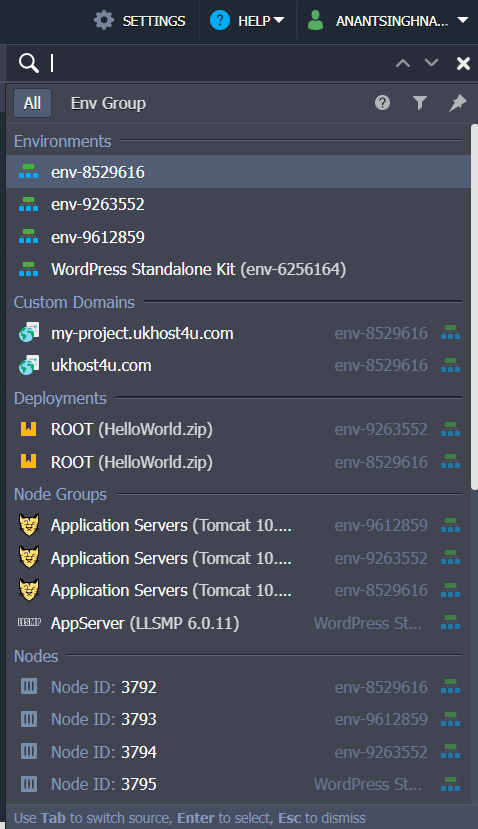
8. Searching The Dashboard
UKHost4u makes it easy to search within the dashboard by providing the in-built search. Its functionality is quite simple, just click on the search bar at the top-right corner of the dashboard. You can also press Ctrl+F. Type what you are looking for in the search box and press the enter button.
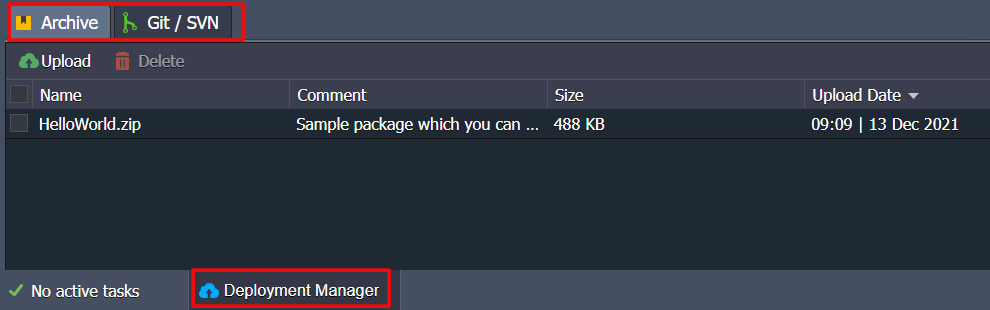
9. Deployment Manager
You will find the Deployment Manager at the bottom of the cloud dashboard. It keeps the applications to convert their deployment into your environments. You will find these two sub-sections within this tab;
- Archive: It stores the application package which can be uploaded via a local device or an external URL.
- Git/SVN: The access credentials to your projects are saved in the Git/SVN repositories. Here, tap on the Add repo button and enter the details.
Once your package is listed in the Deployment Manager, it will be deployed to the required environment by default by following the associated guide.
10. Tasks Section
The tasks section is given at the bottom-left corner of the dashboard. It lists all the live and historical information on the tasks that UKHost4u is performing or has already performed.
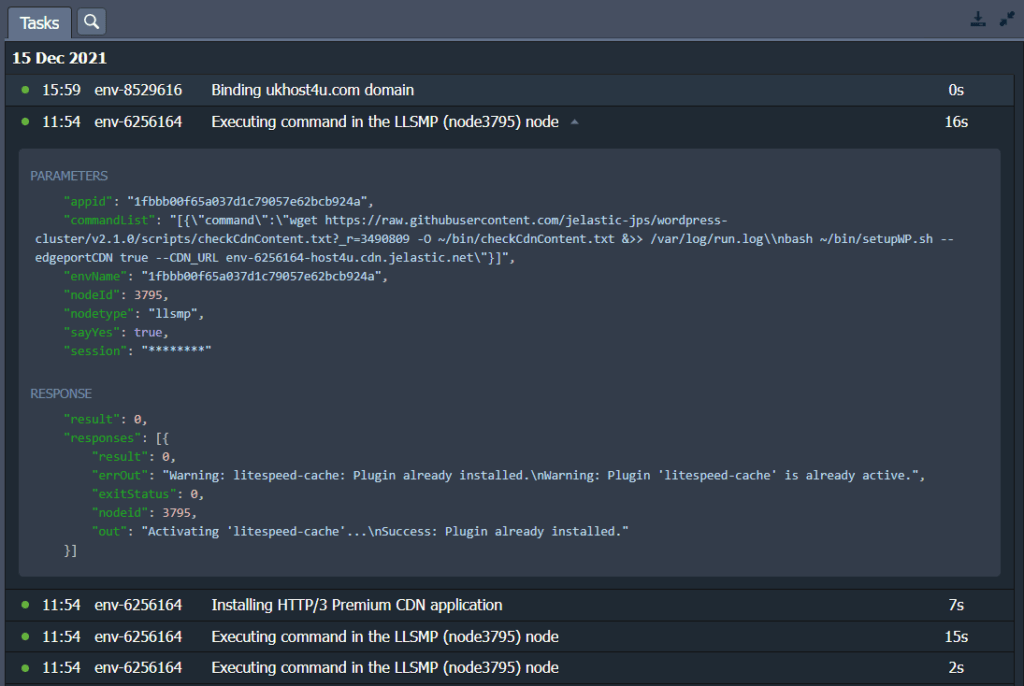
For each record, you will see the following data;
- Status: this shows the operation status via green dot (success), Spinner (in progress), or red dot (error).
- Time: All tasks are grouped by dates or days. It displays the starting time of an operation.
- Environment: The name of the environment where the operation has occurred is displayed.
- Task: Describes the operation or error in a task
- Duration: It displays the time taken for the execution of the operation.
Shift to the Activity log if you want to see the full list of actions done on the account and not just the recent ones. You can search for the required tasks by using the advanced search filter.
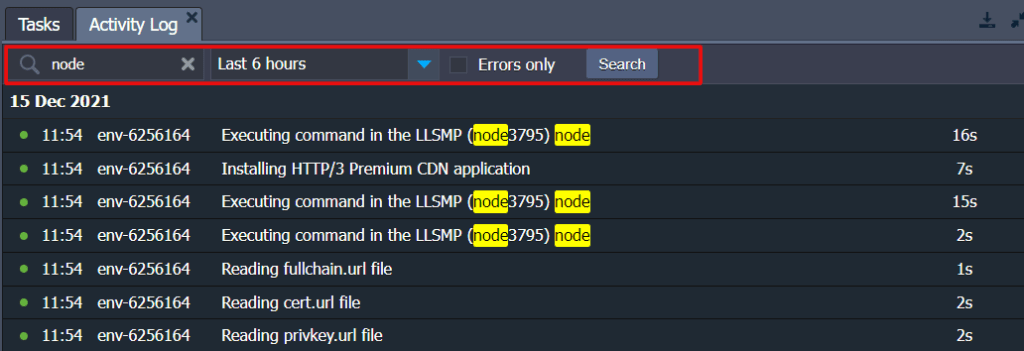
- Search: it is attempted by the parameters and server response.
- Date Range: Adjust the date range to customise your search.
- Errors Only: Check the Errors Only box to hide the completed operations.
In UKHost4u, using the Tasks section, you can track your activities and also troubleshoot the issues.
11. User Settings
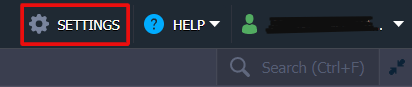
On the top-right corner of the UKHost4u dashboard, there is a Settings tab. Click on it to open the configuration settings.
In user settings, you will see the following sections;
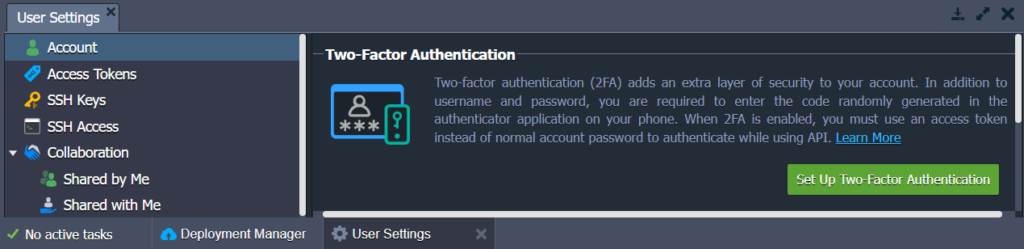
- Account: This lets you manage two-factor authentication of your account and change the password.
- Access Tokens: With this, you can manage personal access tokens for your account.
- SSH Keys and SSH Access: These two sections open four subsections;
- Public Keys- it saves public keys added to the cloud platform.
- Private Keys- display the list of private keys added to the UKHost4u platform.
- SSH Connection- this displays the needed steps to connect to your account using the SSH gate and lets you access particular nodes straight in the web browser via Web SSH.
- SFTP/Direct SSH Access- Shows connection data for SSH/FISH protocols.
- The Collaboration: This section is divided into two sections;
- Shared by me: This allows you to share your environment with other users on UKHost4u.
- Shared with me: This lists the environment collaborations you are a part of.
12. Help and Account
The last two tabs of this dashboard are Help and Account:
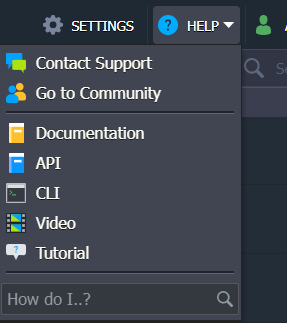
- Help:
- Contact Support: Click on this to go to the platform’s customer support page.
- Go To Community: This is a link to UKHost4u online community at StackOverflow.
- Documentation: Redirects you to the Jelastic devs documentation.
- API: Takes you to the API documentation of Jelastic.
- CLI: Brings you to Jelastic CLI overview.
- Video: This redirects you to the Jelastic cloud’s youtube channel.
- Tutorial: Plays a short guide that explains how to work with the platform.
- How Do I?: Displays some documents related to your queries or requests.
- Account
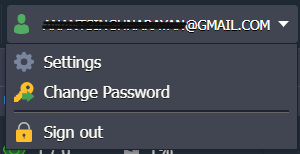
- Settings: This will redirect you to the User Settings Section.
- Change password: This will open a dialogue box, where you need to fill (Current Password, New Password, and Confirm Password)
- Sign-Out: Using this, you can log out of the current account.
Now you have a basic understanding of the cloud dashboard and will not face any problems working on it. Get in touch with the support team of UKHost4u in case you still have some queries.
