Search Knowledge Base by Keyword
Building Your First Environment
The initial step of application hosting is building the environment using the needed isolated containers. The UKHost4 u platform gives a very strong and instinctive user interface to build and manage your environments to your desired needs. This section will teach you all the required steps with an exclusive explanation of available features and specifications.
1. Sign in to your UKHost4u cloud platform using the login credentials and click on the ‘New Environment’ tab in the top-left corner of the dashboard.

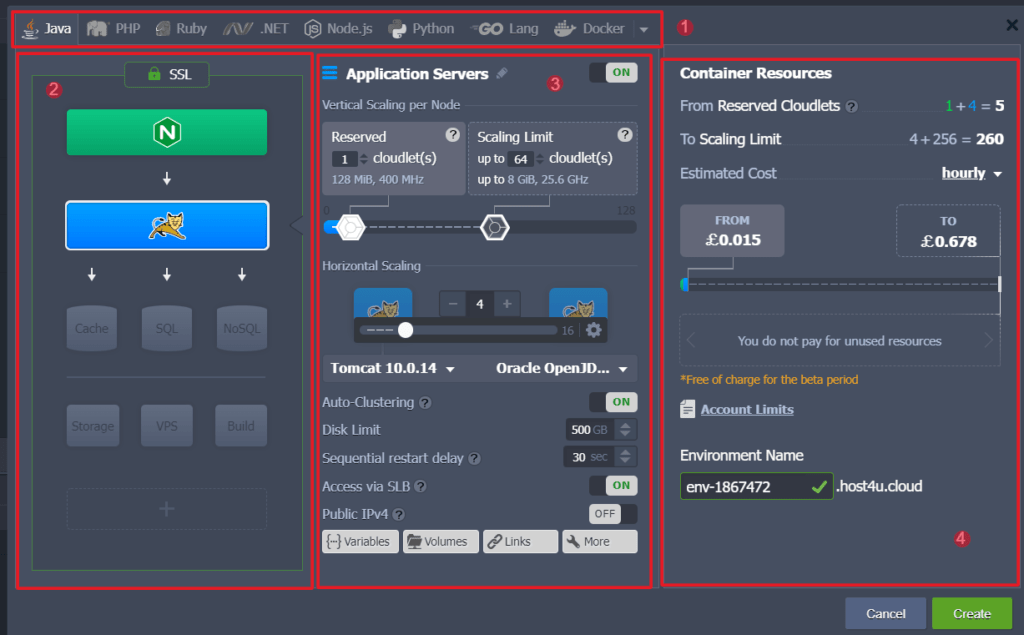
2. The Topology Wizard will open up, inside that you can make all the required customizations. We advise to make the customization in the following order;
- Select the programming language or a specialized deployment service
- Construct the Topology by joining the needed software stacks.
- Manage the node resources and specifications.
- Finalize the creation by reviewing estimations and naming the environment.
Next, we will see each of these aspects in detail giving a detailed explanation of all the prospects. The environment creation process might seem intricate and difficult but once you are familiar you will be able to construct a new environment or modify the existing one effortlessly.
1. Select the programming language or a specialized deployment service
As the initial step of building an environment, you need to choose the deployment solution needed for your project. UKHost4u is a diversified platform that allows multiple choices for application development and hosting which fits the demands of the most challenging clients.
- The most common and advised option is certified containers. These bundles are significantly constructed and handled by UKHost4u. They support all platform specifications by default for effortless application hosting and development.

Select the tab with the needed programming language tab to move ahead with the UKHost4u certified containers.
- The other deployment options are available using the Docker tab. All the alternatives stated below are to use the basic UKHost4u system container that makes them suitable with most of all platform differentiating features such as horizontal and vertical scaling.
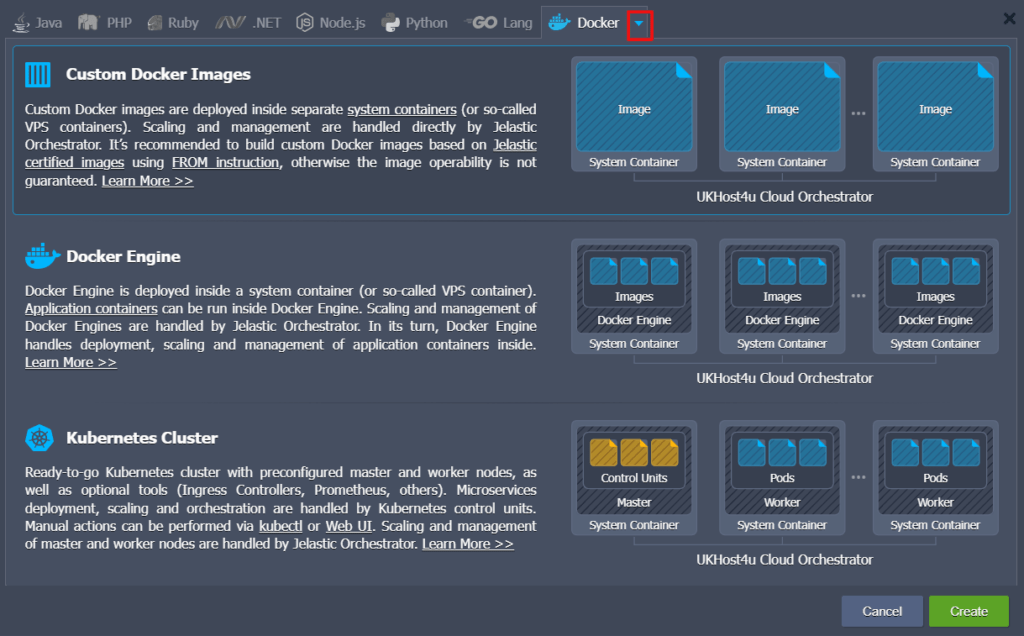
1. Custom Docker Images: This implies any Docker image that has been deployed into the system container. In contrast to the organized containers, this choice gives access to a wide variety of solutions, look for the whole Dock hub history or work with the private repository. Still, the software functionality and compatibility with the UKHost4u platform cannot be assured as the content is handled by the assigned imaged maintainers. It’s always advisable to create custom images depending on the UKHost4u images using the FROM guidelines.
2. Docker Engine: There is a Docker Engine CE is deployed within the system container. It gives all the Docker native operationality together with scaling, deployment, and handling of multiple application containers within.
3. Kubernetes Cluster: An all set Kubernetes cluster along with a preconstructed control plane and worker nodes based on system containers. The deployment, scaling, and organization of the microservices inside are managed by the control units of Kubernetes, while UKHost4u scales and handles the control plane and worker nodes.
2. Constructing Topology
You can construct or adjust the environment topology with the help of the left side of the wizard. Think of it as a guide that helps you in environment creation. Here are some blocks that are available in the Topology wizard;
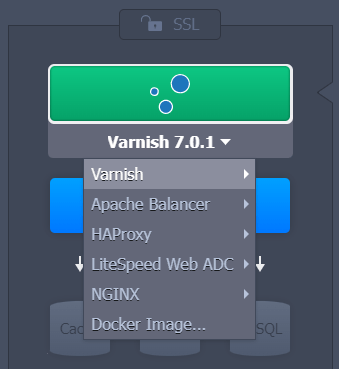
- Load Balancers – These are the stacks that function as a starting point for the environment to allot incoming demands and form equal load on other nodes.
- Application Servers – these are the web servers responsible for running your application.
- Databases – SQL or NoSQL database solutions to store and handle the data.
- Cache Node – It is a caching system to boost the speed of web applications to minimize the database load, known as a Memcached object.
- Shared Storage – It is a committed storage node with NFSv4 support, widened disk space and enhanced performance.
- VPS – these are virtual private servers leading the Ubuntu, CentOS, Windows OS, and Debian.
- Build Node – A formed automation programme for Java-based projects.
- Extra or Custom Layers – any of the stacks listed above.

1. The UKHost4u platform gives several most popular options for these segments based on the default role. Also, you can utilize the Search tab quickly to look for any UKHost4u handles stack.
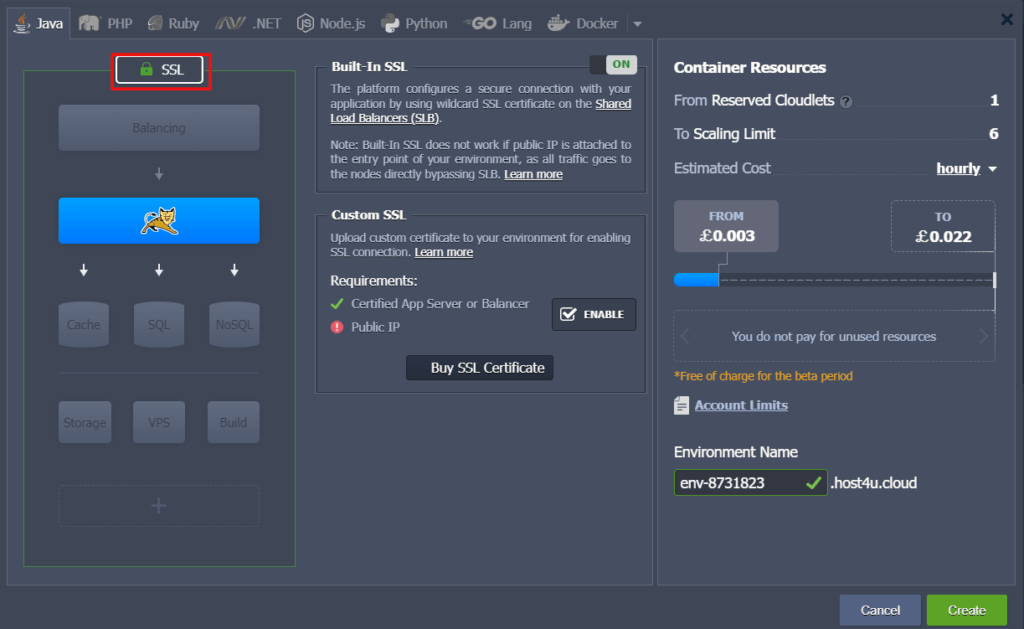
2. An SSL protection of your environment can be configured using the similar-named section. Two options are available here;
- Built-In SSL: It permits an already committed SSL certificate, shunning any extra checks and saving you from extra time on certificate validation. However, it is registered to the default environment domain name solely and wouldn’t work in case the Public IP is linked to your servers.
- Custom SSL: this displays your custom SSL certificates for the environment. Tap on the enable tab to fulfil the needs automatically and take help from the linked instructions for any further assistance.
3. Manage Node Resources And Topology
After understanding the structure of Topology you can modify each specific layer using the Topology wizard’s middle section. Let’s observe and understand the available options of the Wizard from the start to the end;
1. You can enable a layer on or off. Also, you can give the layer a custom alias.

2. By adjusting the number of reserved and dynamic cloudlets, construct the automatic vertical scaling for the nodes inside the layer. 1 cloudlet = 128 MiB of RAM and 400 MHz of CPU.0
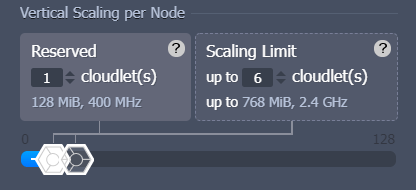
You can take it as the least and most CPU and RAM capacities per server. It must be noted that, regardless of how high the scaling limit is the resources are charged as per actual usage. This helps in getting over the load spikes and preventing from payment of unused memory or processor.
3. With the Horizontal scaling section, it is permitted to define the number of nodes inside a layer and choose the desired scaling mode i.e., stateful or stateless.
You can also use the drop-down lists to alter the stacks and type or version of engines. If you are selecting a pre-existing environment then these lists will automatically take you to the container redeploy box to apply the modifications.
4. After that, manage the other settings.
This list will be different for specific stacks and account permissions;
- Auto-Clustering: this is default clusterization for some UKHost4u templates. Extra fields will display only after activation e.g. scheme selection for the database cluster.
- Disk Limit: This indicates the amount of disk space kept aside for each node. The assigned Shared storage containers are mostly given with enormous storage capacity.
- Sequential Restart Delay: the delay amidst the reboot operation completion on one node and start on the other. This is used for preventing downtime, making sure that at least one server is working. For all the nodes inside the layer, you can set it to ‘-1’ for the synchronous restart.
- Access Via SLB: blocks permission to the nodes of the layer using the platform shared Load Balancer.
- Public IPv4: link the particular number of external IP addresses to each node inside the layer.

5. You will find the buttons for the container configuration tools at the bottom of this section;
- Variables: check and handle a list of environment variables for the recent year.
- Volumes: To ensure the integrity of files during the container lifecycle, it manages the list of data volumes.
- Links: Interlink the layers within the environment.
- Ports: See details about the containers’ ports.
- Entry Point/ CMD: manage containers’ entry point and run command.

4. Finalize the creation by reviewing estimations and naming the environment.
Once all the configurations are completed, you can check the number of allocated resources and the evaluated cost of the environment.
1. The most important measuring units in UKHost4u are cloudlets. In this image, you will see the reserved cloudlets and the scaling limit for the entire environment.

These values are highlighted with the following colours for better analysis;
- Green: Load balancers
- Blue: Application Servers
- Gray: Other stacks
2. You can check the estimated cost of your environment, next. The prices will appear on the widget with the same colour-marking as mentioned above. You can modify the period like hourly, monthly, or daily.
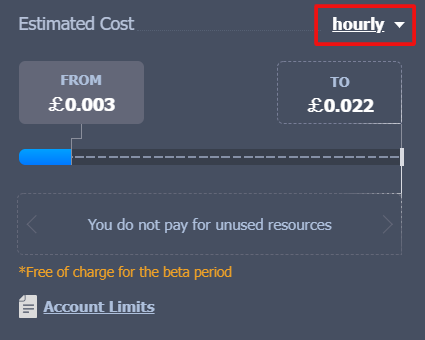
The FROM toggle indicates the prices that will be entirely charged including reserved resources. The TO toggle shows the maximum price that will be charged if all the nodes of the environment are going to entirely consume the resources till the scaling limit during the entire period.
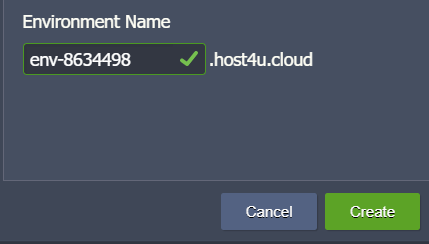
3. Finally, give a name for your environment and then tap on the Create tab to move further.
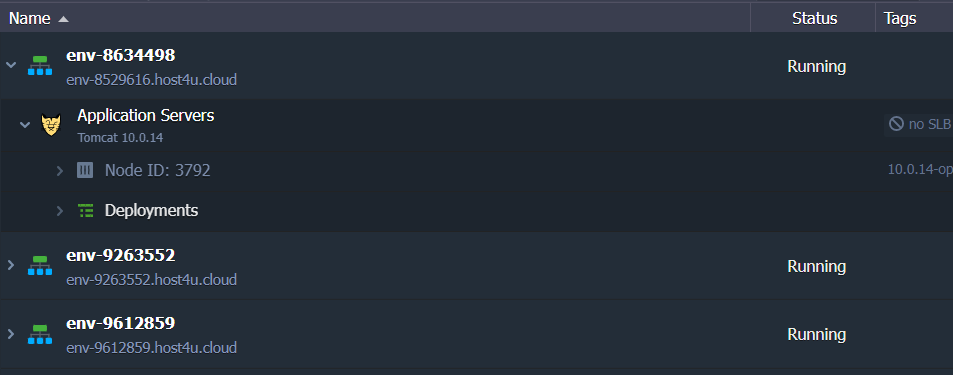
That’s it! You will notice your new environment display on the UKHost4u dashboard. You are now ready for application deployment and to use your cloud environment further.