Search Knowledge Base by Keyword
Certified Containers Deployment
For fast deployment and convenient management, our cloud platform supports the most famous software stacks as organised and pre-constructed solutions. All of these certified containers are strictly analysed and improvised to be used inside the dashboard.
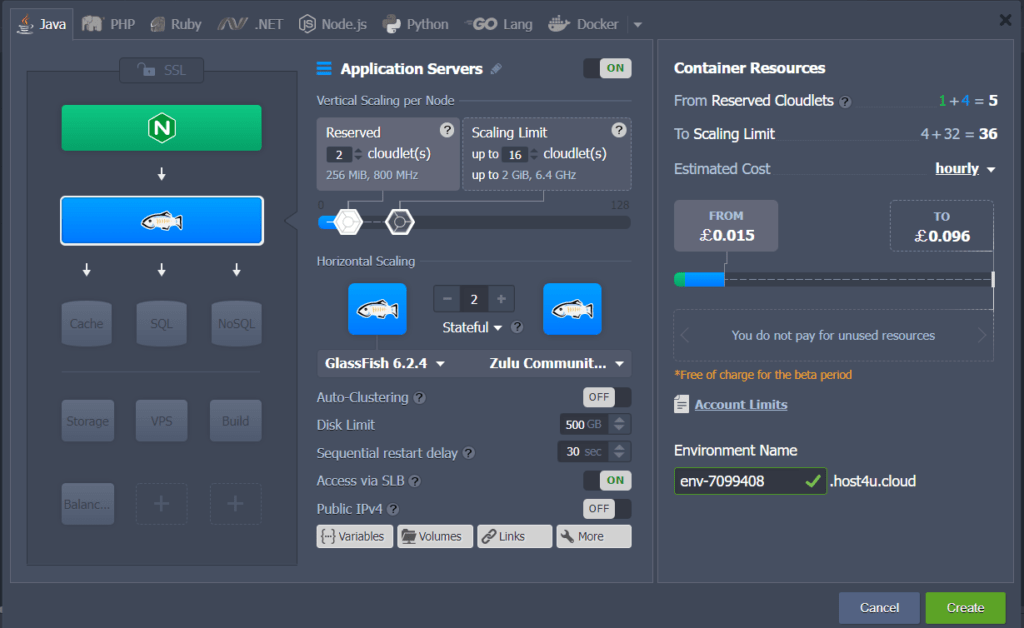
1. Click on the New Environment button to open the Environment Topology wizard. Here you can deploy the certified containers.

2. Choose your desired programming language by clicking on the appropriate tab.

3. On the left side of the wizard, you can add the certified containers. The software stacks are categorised on the basis of their function;
– Load Balancers: These are the software stacks that work as an entry point for the environment to create even load on all the nodes and distribute incoming requests too.
– Application Servers: This comprises the web servers that conduct your application.
– Databases: SQL and NoSQL database solutions help in saving and managing your data.
– Cache Node: Through Memcached caching system web applications are sped up by minimising the database load.
– Shared Storage: It provides great disk space, a dedicated storage node along with NFSv4 support, and enhanced performance.
– Elastic VPS: CentOS, Ubuntu, Debian, and WindowOS along with virtual private servers.
– Build Node: It is a build automation tool for Java tasks.
– Extra: Some additional services or any of the software stacks given above.
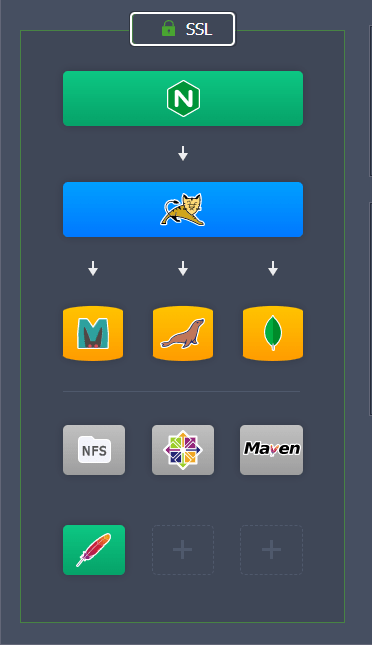
With the help of this section you can easily configure and adjust your Environment Topology.
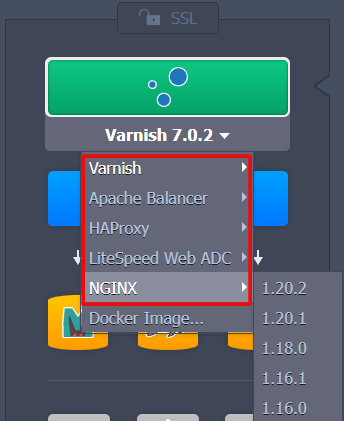
4. The UKHost4u offers several solutions of certified containers for every role inside your environment topology. Just tap on the suitable section to extend the drop-down menu of the most popular solutions. For instance, the following options depict the certified load balancers;
5. You can manage the added nodes in several ways through the central part of the wizard. Certified containers have certain additional options, such as Auto-Clustering.
Finally! Click on the create button to finish the configuration and create the environment. Wait patiently for a few minutes till your environment is deployed with certified containers.
