Search Knowledge Base by Keyword
Custom Containers Deployment From Docker Hub
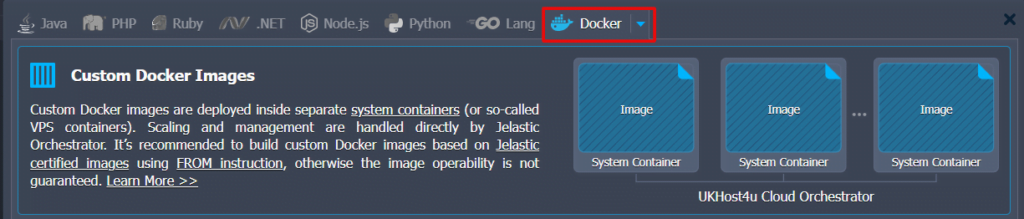
Docker is a software stack that aims at facilitating the deployment of applications, by hosting them in containers. Docker containers are isolated environments for which you can allocate CPU, memory and Disk space on demand. We support Docker from our Cloud Platform.
In this article, you will learn how to begin with custom docker containers by creating and managing all kinds of applications and services that are present inside the Docker Hub.
Custom Containers from Docker Hub
Launch the topology wizard by clicking on the New Environment tab on the upper-left corner of the UI.
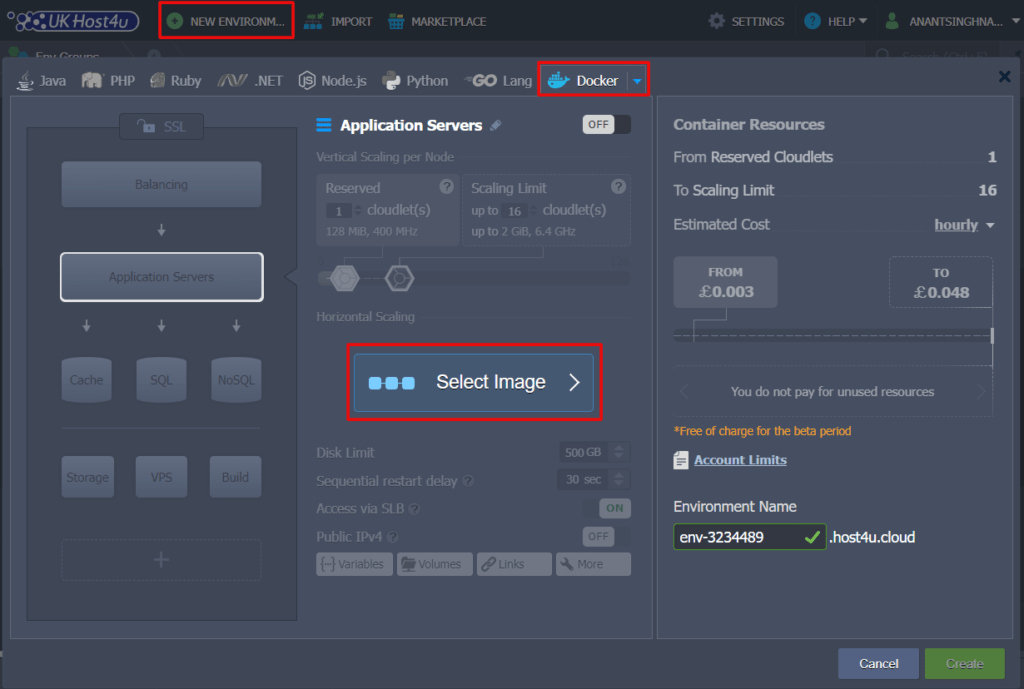
At the top of the wizard frame, click on the Docker option. Theorem you will see multiple blocks with distinctive names to the left side, where each of them gives the ability to establish a custom container based on the chosen Docker image. With the help of these sections, divide and organise the topology according to your requirements.
Shift to the needed layer and move forward with the Select Image tab.
In the Select container frame, you will come across a few sections;
- Quick Start – Click on this tab to see a set of the most famous or advised templates for the current layer.
- Search – You can find the preferred template at the central Docker Hub registry with this tab.
- Custom – this tab lets you add your own template from the custom or private registries.
- Favourite – Here you can store the images for faster access.
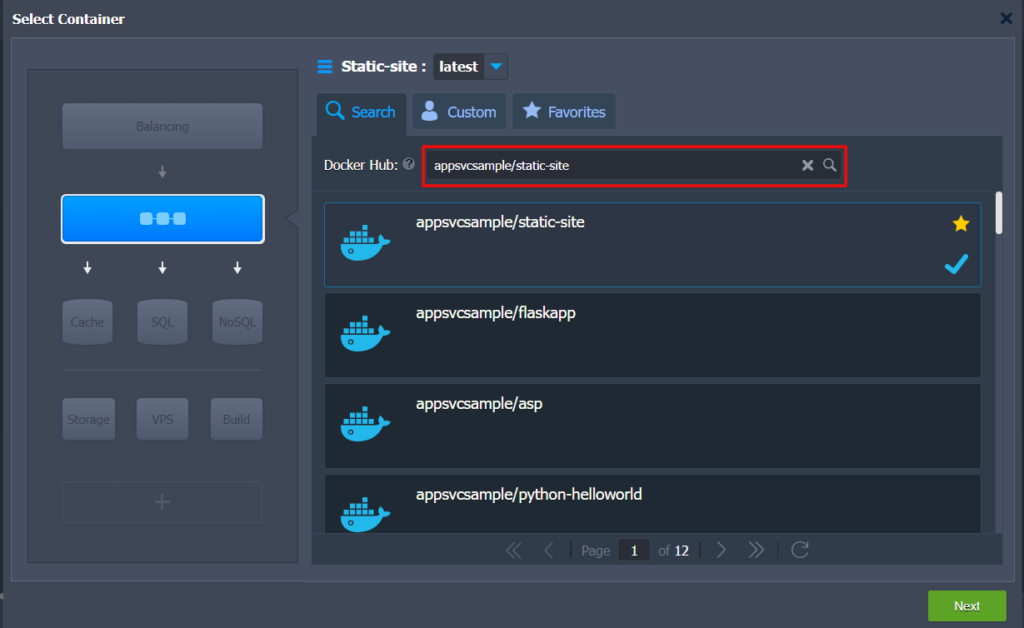
For example, go to the official Docker Hub registry and search it by entering the full or partial name that you need such as appsvcsample/static-site, and click on the enter button to proceed.
The platform will reveal useful results within some time. Now just click on it to add it to the selected layer. Choose the requisite tag with the extended drop-down menu on the upper part of the frame. This field enables searching to handle images with several tags.
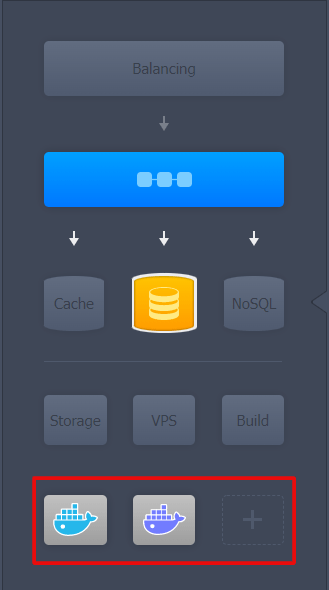
You cannot add different Docker images to the same layer. Use different layers to add more images. The extra blocks at the bottom let you expand topology as per your needs.
After finishing the customisations click on the Next button.
3. Once you have added all the necessary custom containers and returned to the wizard, you can start configuring them and handling them just like another regular node;
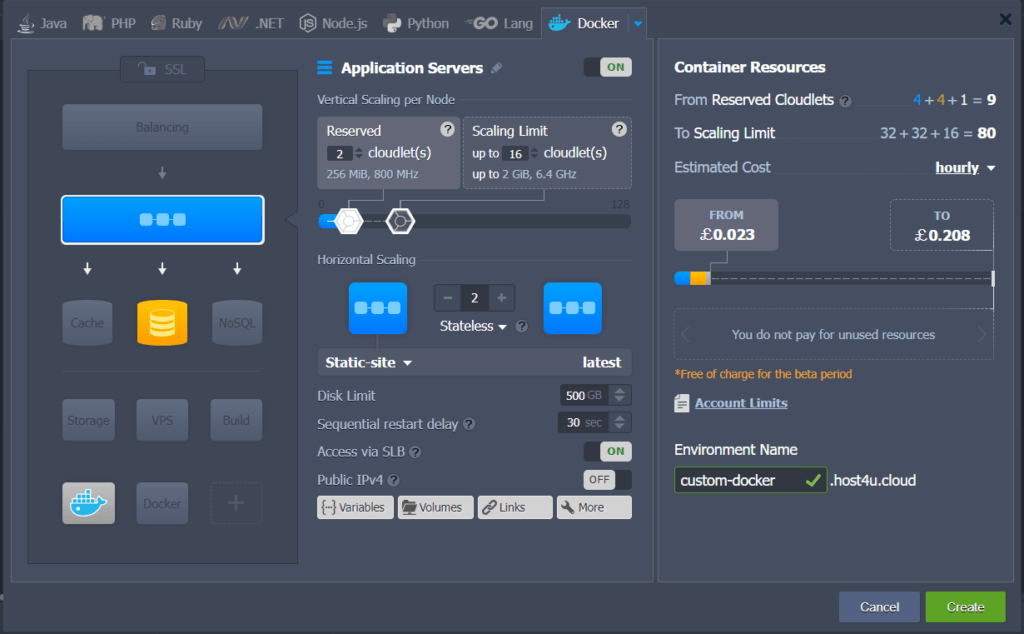
Tap on the Create button at the bottom of the topology wizard and wait for the environment creation.
4. You will see your desired environment with the custom containers on the dashboard in a few moments.
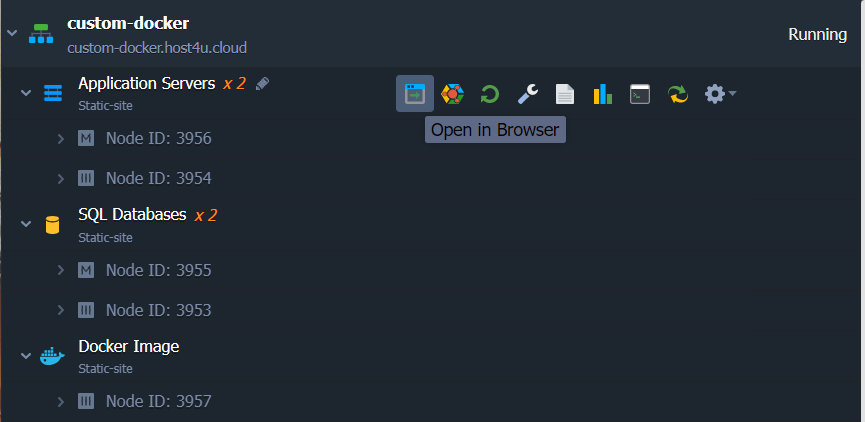
Corresponding to the environment you will see the ‘Open in Browser’ tab, just click on it to open each container or the entire environment through the assigned domain. In the case of the entire environment, the application server or balancer’s layer template will be launched.
Here, you can see a sample Docker application after opening the image in the browser.
