- How to add a DNS record in cPanel
- How to Change an MX Record in cPanel
- How to change PHP settings in cPanel
- How to create a Domain Alias/Parked Domain in cPanel
- How to create a domain redirect in cPanel
- How to create a subdomain in cPanel
- How to create an Addon Domain in cPanel
- How to edit a DNS record in cPanel
- How to Remove a Domain in cPanel
- How To Check Email Disk Usage In CPanel
- How to create an email account in cPanel
- How to Create an Email Filter in cPanel
- How To Create an Email Forwarder in CPanel
- How to import/export emails in Horde webmail?
- How to Reset your Email Password in CPanel
- How to set up an autoresponder in cPanel
- How to whitelist a domain name in ASSP
- How to whitelist an email address with ASSP
- How Can I Check My Invoices?
- How to Access your Support Tickets in the Client Area
- How To Add A Contact/Sub-Account In The Client Area
- How to Add Funds to your Billing Account
- How To Change Your Account Details
- How To Change Your Password For The Client Area
- How to Login to the Client Area
- How to Set Up a Direct Debit on Your Billing Account
- How to Unblock your IP Address in the Client Area
- Why Is My Account Suspended?
- How To Access Webmail?
- How to Set Up an Email Account on Gmail for Android
- How to Set Up an Email Account on iPhone
- How to Set Up an Email Account on Mac Mail
- How to Set Up an Email Account on Outlook (Desktop)
- How to Set Up an Email Account on Outlook for Android
- How to Set Up an Email Account on Thunderbird
- How to Set Up an Email Account on Windows Mail
- What is IMAP?
- What is POP3?
- What is SMTP?
- Articles coming soon
- How to Block an IP Address in WHM
- How To Change Language – WHM
- How to change root password in WHM
- How to Change your Server Hostname in WHM
- How to check Service Status in WHM
- How to Create a Package in WHM
- How to create an account in WHM
- How to edit a DNS Zone in WHM
- How to Generate a Certificate Signing Request (CSR) in WHM
- How to Login to WHM
- How to Manage the Mail Queue in WHM
- How to Perform a Reboot in WHM
- How to Restore a Hosting Account Backup in WHM
- How to Set Backup Configuration in WHM
- How to Set Server Time Zone in WHM
- How to Whitelist an IP Address in WHM
- Show all articles ( 1 ) Collapse Articles
- Adding Captcha Protection On Your WordPress Site
- How to add a new user to Wordpress
- How to add and delete categories in Wordpress
- How to Change Header Image in Wordpress
- How to change my WordPress website title
- How to change password for Wordpress
- How to change theme in Wordpress
- How to create a page in Wordpress
- How to create a post in Wordpress
- How to Create a Post in Wordpress
- How to Customise Menus in Wordpress
- How to install a plugin in Wordpress
- How to Login to Wordpress
- How to Manage Widgets in Wordpress
- How to Reset a Lost Password in Wordpress
- How to set your Wordpress blog to private
- How to Upload Media in Wordpress
- Show all articles ( 2 ) Collapse Articles
- Articles coming soon
How to Change PHP Settings in Plesk
0 out Of 5 Stars
5 Stars | 0% | |
4 Stars | 0% | |
3 Stars | 0% | |
2 Stars | 0% | |
1 Stars | 0% |
Plesk supports multiple PHP versions. Different PHP versions are sometimes not fully compatible with the website written on another PHP version. For example, a website written in PHP 5.4 might not function properly if your domain is configured in PHP 5.6. If you are not sure which PHP version to choose, you can always configure it to the default setting, the latest or another version available on the system.
First, you need to login to the Plesk control panel.
Once you are on the Plesk main screen, locate and click on the “PHP Settings”.

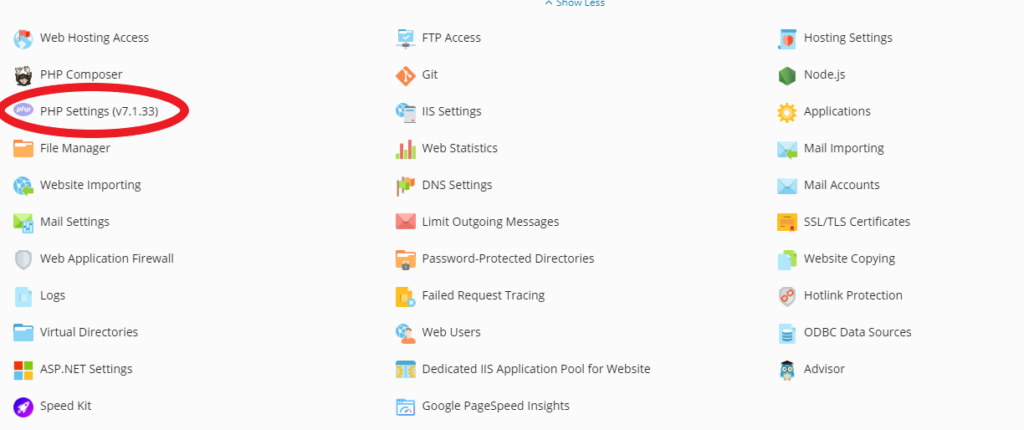
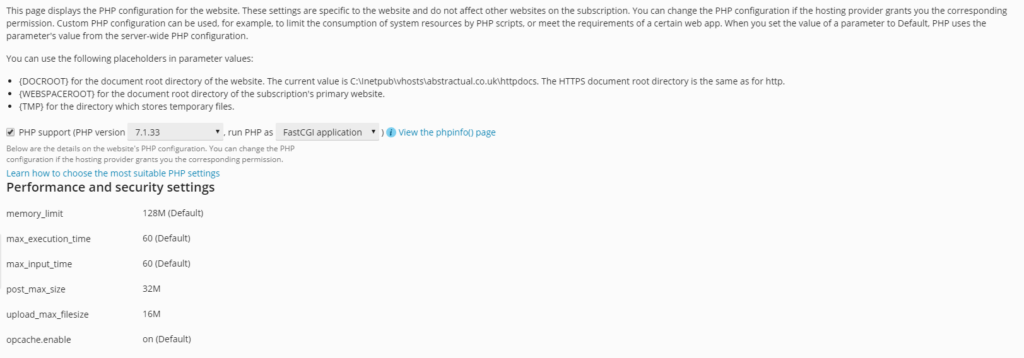
You will then be redirected to the PHP settings page where you will see the PHP version you are currently on.
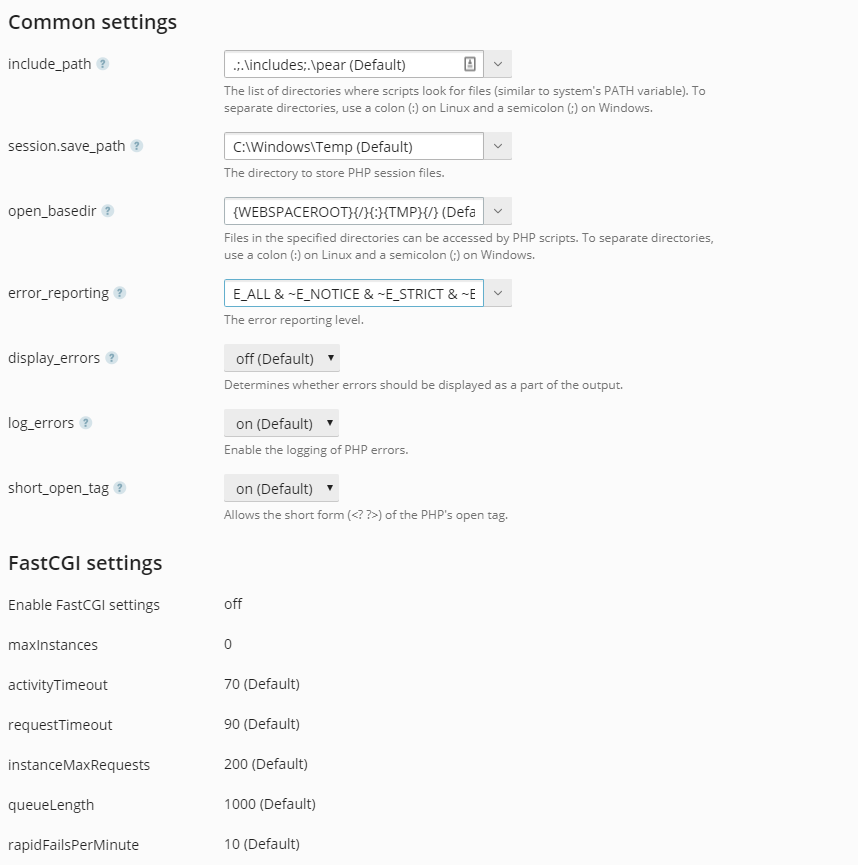
Click on the drop down menu and choose the version you need to configure for your website. Within the same page you will find the different settings for your PHP version that you can adjust. For example, the “memory_limit” which is the maximum amount of memory in bytes that can be allocated for a PHP script and the “upload_max_size” which can be adjusted to for the maximum files size that can be uploaded.


Once you are done with the configuration, you may proceed to click on “Apply” to save the PHP settings and click “OK” for you to be redirected back on the domain’s main screen.
