Search Knowledge Base by Keyword
How to configure MailScanner in cPanel
MailScanner is a powerful email security and spam protection system that integrates with cPanel. Configuring MailScanner in cPanel allows you to enhance your email filtering capabilities and protect your email accounts from threats such as viruses, malware, and spam. This guide provides step-by-step instructions on how to configure MailScanner in cPanel.
Configuring MailScanner is easy.
- Open your preferred web browser and enter the URL of your cPanel account.
- Enter your cPanel username and password.
- Click on the “Log in” or “Sign in” button to access your cPanel account.
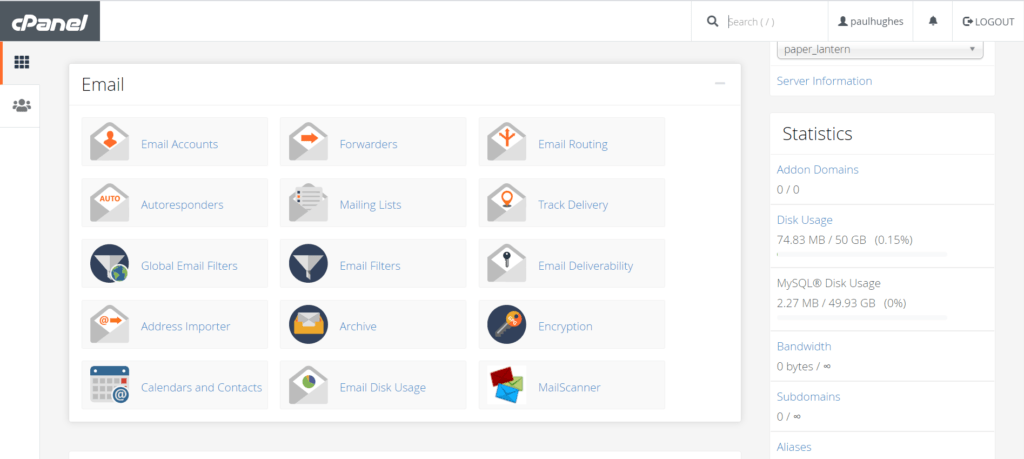
After logging in to cPanel, navigate to the “Email” section. The exact location may vary depending on the cPanel theme or layout.
Look for MailScanner option and click on it. This will open the MailScanner Configuration page.
On the MailScanner Configuration page, you will find various settings and options to customise the behaviour of MailScanner. Here are some important settings to consider:
- Spam Actions: Choose how MailScanner handles detected spam emails. You can delete, quarantine, or mark them as spam.
- Virus Scanning: Enable virus scanning to detect and handle emails containing viruses or malware.
- Whitelist and Blacklist: Maintain a list of trusted senders (whitelist) or known spam sources (blacklist) to customise email filtering.
- SpamAssassin: Integrate SpamAssassin, a powerful spam detection tool, with MailScanner for enhanced filtering accuracy.
- Attachments: Configure how MailScanner handles email attachments, such as blocking specific file types or scanning compressed archives.
- Quarantine: Set up a quarantine area to isolate suspicious emails for review or further analysis.
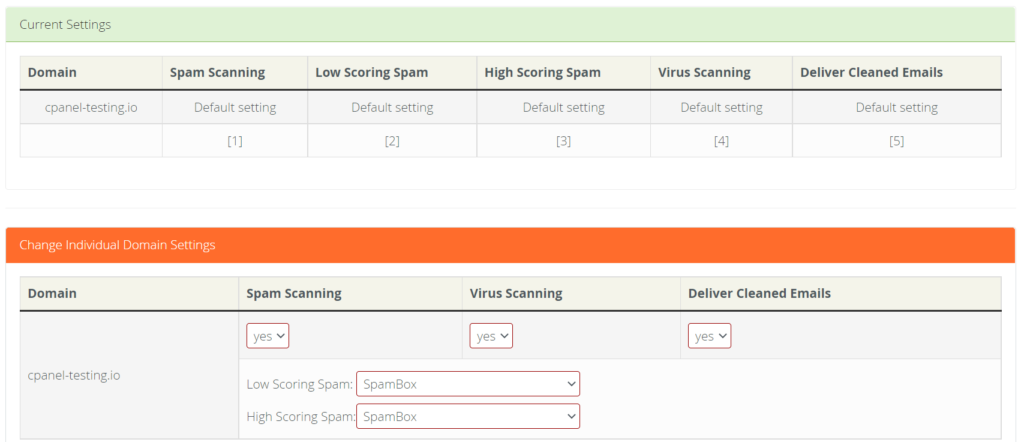
The current settings, as the name suggests, display the existing spam and virus scanning settings for your domain.
In the “Change Individual Domain Settings” section, you can modify the spam and virus scanning settings for each domain listed under your main hosting account. Let’s take a closer look at these individual settings:
- Spam Scanning: This option allows you to enable or disable the spam scanning filter of MailScanner. You can choose between “Yes” or “No” to control whether spam scanning is active.
- Virus Scanning: Similarly, you can enable or disable the virus scanning filter for your email using this setting. Choose between “Yes” or “No” to activate or deactivate the virus scanning feature.
- Delivered Cleaned Emails: Enabling this setting ensures that emails with detected viruses are delivered after the viruses have been removed. This helps protect your system from potentially harmful email attachments.
- Low Scoring Spam: This setting allows a moderate number of emails to pass through while still blocking highly spammy messages. The default spam filter score is set to 6. You can also set up an email address such as spam@yourdomain.com to handle filtered spam emails. Note that you must configure this email address for it to work correctly.
- High Scoring Spam: This setting determines the initial threshold or spam score for your email. By default, it is set to 10. It instructs MailScanner on how to handle emails that are highly likely to be spam. Similar to low scoring spam, you have options to deliver, delete, forward to spam@yourdomain.com, or send them to the SpamBox.
Please note that the options mentioned above are available for customisation to suit your specific requirements and preferences.
Email Black/White List Settings
Click on Email Black / White List Settings on the MailScanner page.
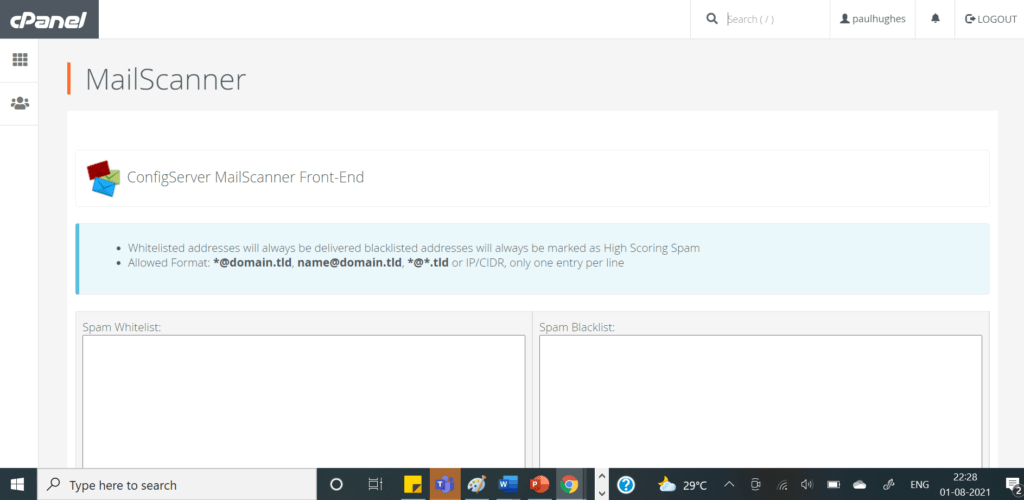
In this section, you have the ability to add email addresses to the Spam Whitelist and Spam Blacklist.
By adding email addresses to the Spam Whitelist, you are indicating that emails from those addresses should not be marked as spam and should be delivered to your inbox. This is useful for ensuring that important emails from trusted senders are not mistakenly filtered as spam.
On the other hand, the Spam Blacklist allows you to specify email addresses that should be treated as spam. Any emails originating from addresses in the Spam Blacklist will be flagged as spam and handled according to your configured MailScanner settings.
To add email addresses to either the Spam Whitelist or Spam Blacklist, follow these steps:
- Locate the respective section on the screen.
- Enter the email address you wish to add.
- Click on the appropriate button to add the address to the whitelist or blacklist.
Remember to save your changes after adding or modifying email addresses in the Spam Whitelist or Spam Blacklist. This will ensure that the updated settings are applied to your email filtering system.
You can have up to 30 entries.
Other Settings
Click the Other Setting section to see a screen like below:
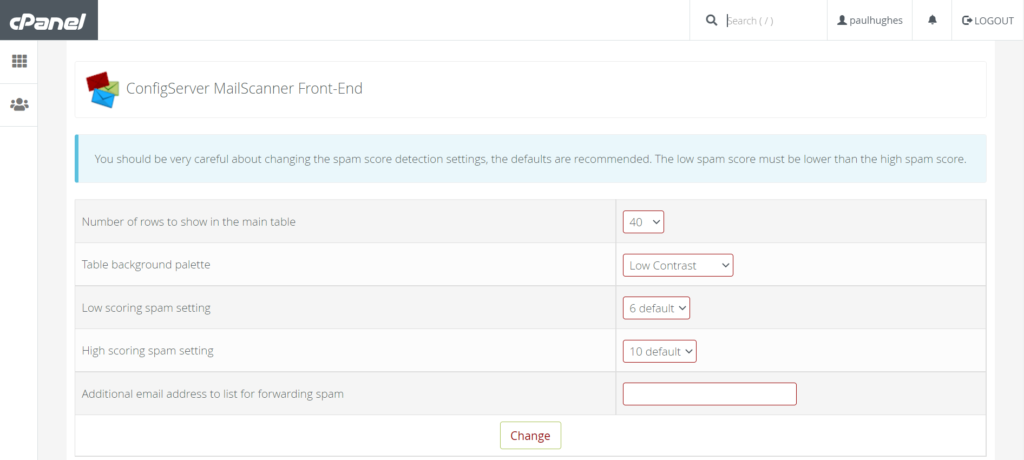
As mentioned earlier in the article, the low score and high spam score metrics define the thresholds for classifying emails as spam. In the provided screenshot, the low scoring spam setting is configured at 6, indicating that any emails with a spam score below 6 will be considered legitimate. This value represents the default setting if you have selected or enabled the low spam score option.
The ‘additional email address to list for forwarding spam’ refers to an email address that can be set up to receive forwarded emails identified as spam. This feature allows you to direct spam emails to a specific address for further analysis or review.
We hope that this tutorial has provided you with valuable insights on how to leverage the MailScanner functionality within the cPanel of your UKHost4u.com account. By configuring and customising these settings, you can enhance your email security and spam protection.
