Search Knowledge Base by Keyword
Import Environment
With UKhost4u’s Import Environment feature, you can execute .json, .yaml, .cs, .yml, and .jps files on the platform to install and configure projects depending on the declared settings automatically. Primarily designed to deploy the previously exported environment copies, it can also be utilized to install your own solutions, announced through JSON, or merge any ready-to-go package from the UKHost4u Jelastic JPS Collection.
Now, let’s see in detail how to work with the Jelastic import operationality on the instance of the exported environment;
1. Tap on the Import button on the top of the UKHost4u dashboard.

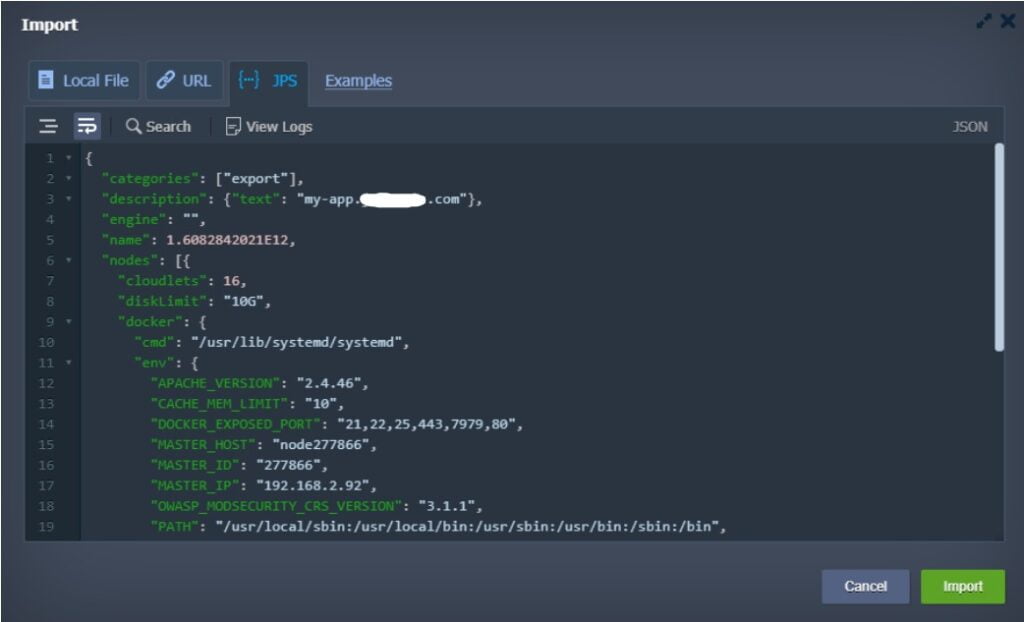
2. Inside the Import window, you will come across three tabs with separate tabs for giving the needed file;
– Local File: to choose a locally stored manifest with the help of the Browse button.

– URL: to enter or paste a direct link to the required file.

– JPS: the built-in editor to input or edit code or to compose your own answer from the beginning.

Click on the Import button given on the bottom-right corner of the window to proceed.
3. Next, you will come across the installation confirmation dialogue box along with the corresponding package details. It shows the details about source platform and export date for the exported environment.

You need to provide information for the parameters in the box;
- Environment: this is the domain name for new environment.
- Display Name: instead of environment domain name, environment alias will appear on the dashboard.
Click on the Import tab when you are ready.
4. Wait patiently for the environment to be created, deployed, and configured.

5. The installation success window will appear on the screen.

You can click on the ‘Open in Browser’ tab to immediately review the result or you can click on ‘Close’ tab to shut this window to reconfigure your environment and application depending on the new platform’s settings.
Also, open your email for confirmation regarding your imported environment.
