Search Knowledge Base by Keyword
Personal Access Tokens
Personal Access Tokens are a substitute approach to validate API requests in UKHost4u PaaS, which, in contrast to the default session-based method gives more versatility and dependability.
Among multiple benefits of tokens, here are some that speak through;
- Several tokens can be generated at once to support different jobs.
- Easy validation with tokens makes sure smaller code-base and faster response when utilizing automation scripts.
- Your information, i.e., login and password are not revealed in the scripts.
- Tokens can validate just a particular part of the account operationality so that you can share them with co-members and 3rd party assistants without forming a security risk.
- Tokens can be created with an expiration date or manually removed at any time.
UKHost4u provides a fully operational virtual interface for the management of tokens directly in the dashboard that makes it the desired way to validate any API integration:
- Access Token Management
- Using Access Tokens
Access Token Management
Here, we will see the procedure of personal access tokens management with the help of UKHost4u dashboard UI:
1. Navigate to the Settings section by clicking on it in the top-right corner of the dashboard.
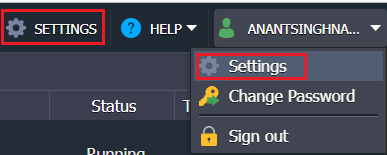
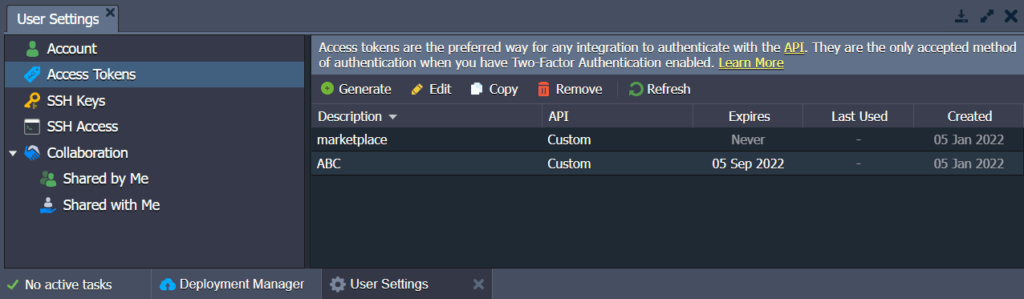
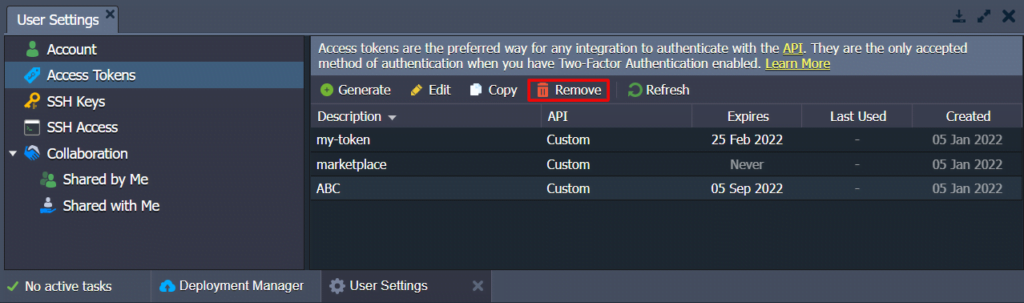
2. In the launched frame, choose the access tokens option to see the list of all tokens on the account. You will have access to the following buttons in the tools panel above the list;
- Generate: makes a new token by giving the description, expiration date, and choosing the needed API methods.
- Edit: modifies the existing token or regenerates it.
- Copy: makes a new token on the basis of the existing token’s parameters.
- Remove: deletes chosen tokens.
- Refresh: shows the latest modifications to the list.
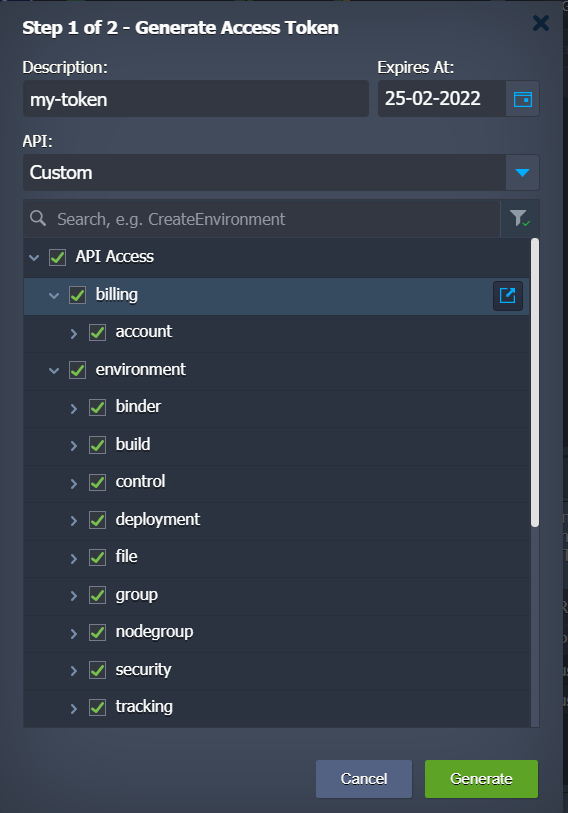
3. While making a new or modifying the existing token, the following frame appears, allowing to adjust;
- Description: custom description given for token.
- Expires At: the date in the dd-mm-yyyy format, that this particular token is valid till.
- API: the name of the API requests set: predefined or custom.
- Use the Search field: the Only Checked filter is used and the direct links to the API docs to manage required permissions for token.
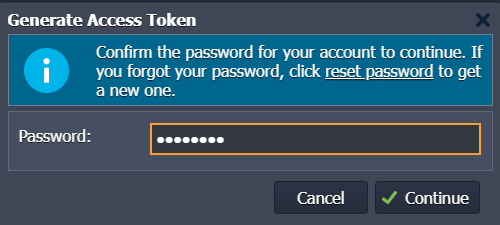
4. All the token modifications on the account need confirmation by entering the password to your account.
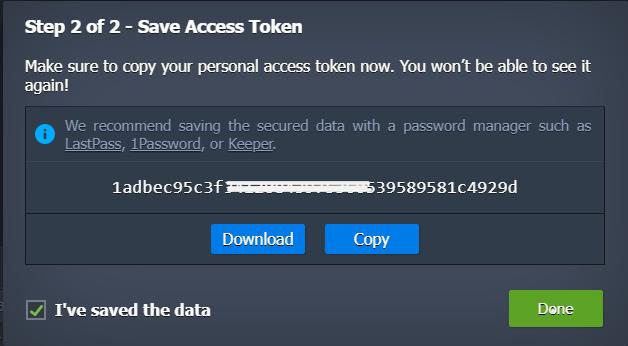
5. Now, you can view the access token value. Make sure that you have saved it, as it won’t be shown anywhere after that ever.
6. You can also remove the tokens that are no longer required by clicking on the Remove button at the tools panel.
Confirm the choice in the pop-up prompt by entering the password to move further. Now, you have an idea of how to manage the personal access tokens on your account and can utilize them in your API requests.
Using Access Tokens
The access tokens usage mainly simplifies API requests validation, as it permits skipping session generation step and makes sure greater reliability in contrast to short-term validity of sessions.
1. Just carry out the required API method, specifying your token inside the session parameter.
For instance, you can stop an environment by typing the following URL into the browser;
In this URL;
- ${platformDomain} – the domain name or platform URL.
- ${envName} – name of the desired environment.
- ${token} – value of the token.

For the success of the operation, you must receive {“result”= θ} in response. Any non-zero value indicates an error.
2. Now, when you go back to the dashboard you will see the suitable environment stopped.

That’s it! API management with tokens is that easy.
