Search Knowledge Base by Keyword
How To Create An Email Filter In cPanel
Email filters allow you to set incoming emails that match specified rules to automatically filter to a certain email address, perform a specific action on the email, or delete the email.
Below are the steps to create an email filter in cPanel
1. Login to cPanel.
2. Navigate to Email Filters in the Email section.

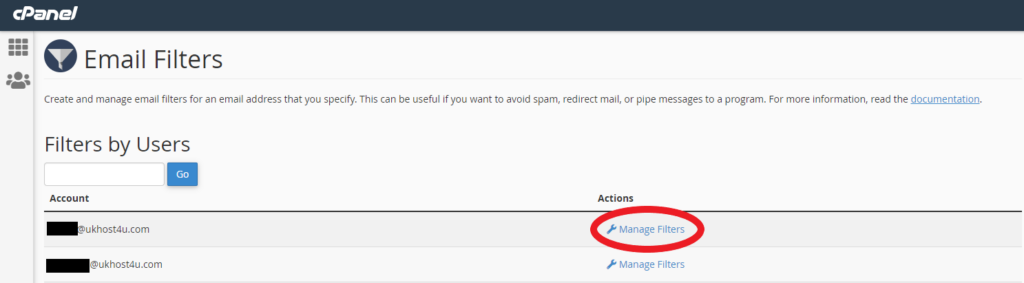
3. You’ll now be shown a list of email accounts, where you can select the email account you’d like to set up a filter for.
4. Click Manage Filters beside the email address.
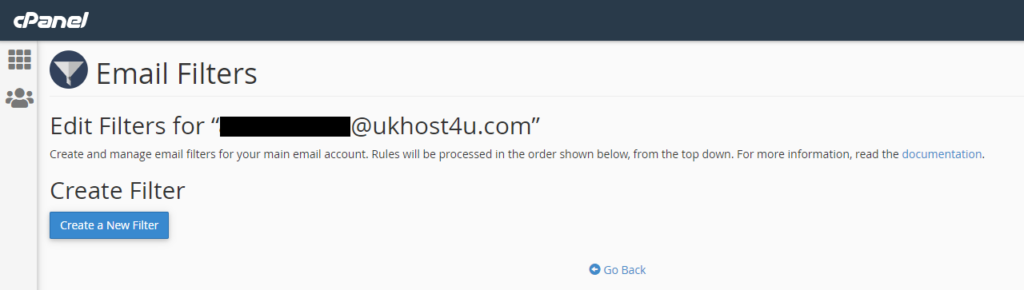
5. You’ll now see any existing email filters if you have any.
6. Now click Create Filter to create a new filter.
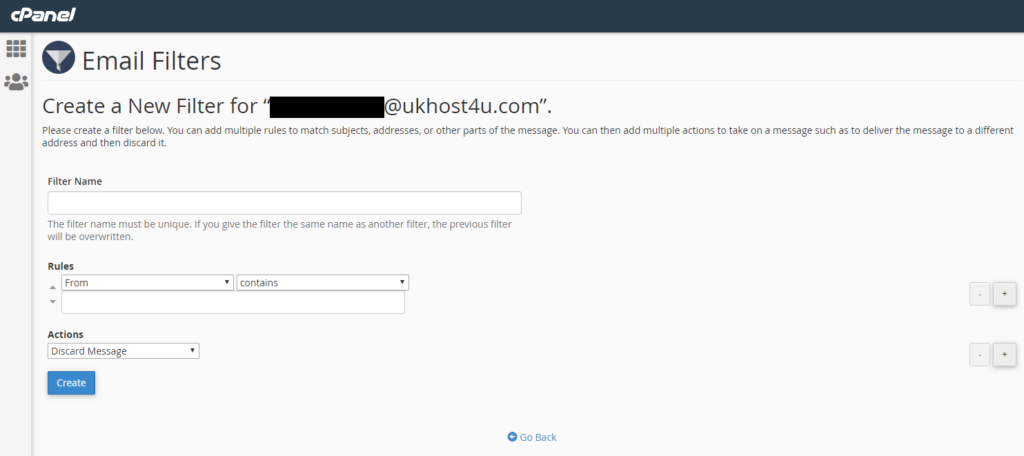
7. You’ll now proceed to the filter creation screen.
Creating a Filter
First, enter the name for your new email filter (this is purely for your own reference).
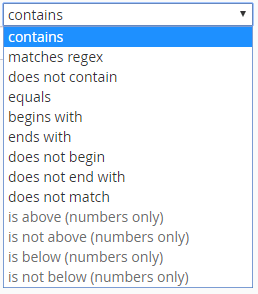
Now, look at the Rules section.
From the first drop-down menu, select the start of the rule that you’d like to use, to determine which emails should be filtered.
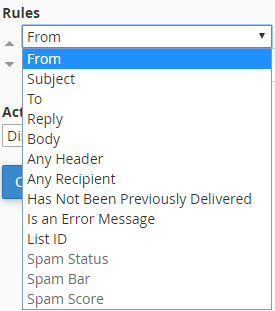
After choosing the first criteria, go to the second drop-down menu and select the relevant rule.
Now that you’ve selected the rule, scroll down and look at the Actions area. This is what the email filter will do to the email once it’s been picked up by the filter.
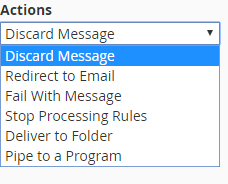
Select your choice from the drop-down menu, and click Create to finish setting up the filter.
