Search Knowledge Base by Keyword
Deploying A LAMP Stack With UKHost4u Cloud Solutions
In this article, we’re going to be guiding you through the process of deploying a LAMP stack on the UKHost4u Cloud Solutions platform. If you don’t already have a free trial, click here.
A LAMP stack is a set of open-source tools that work together to host websites, web applications, and other online services. The acronym LAMP stands for:
LAMP stacks are made up of 4 core components:
- Linux – An operating system (OS) that forms the core of the environment.
- Apache – A robust web server software that delivers content to users over the internet.
- MySQL – A relational database management system (RDBMS) that stores and organizes your data.
- PHP – A popular server-side scripting language used to build dynamic web pages and applications.
Why Use a Cloud-Based LAMP Stack?
1. Scalability and Flexibility
When your application grows, or your traffic increases, you can easily adjust the resources (CPU, RAM, storage) in a cloud environment. You’re not limited to physical hardware constraints, so you can effortlessly scale up (or down) depending on demand. For instance, if you anticipate a large traffic spike during a marketing campaign or a product launch, you can temporarily upgrade your cloud server resources and then revert them once demand stabilizes.
2. Cost-Effectiveness
Our Cloud offers a “pay-as-you-go” pricing model, meaning you only pay for the resources you actually use. This flexible billing model can be especially helpful for start-ups and small businesses with limited budgets. Rather than investing in expensive hardware upfront, you can begin with a modest server and gradually increase resources as your business grows.
3. Reduced Maintenance
Instead of maintaining physical servers—worrying about hardware failures, power consumption, and physical security – our cloud handle the infrastructure for you. This frees up valuable time to focus on developing your website or application’s features. Additionally, our cloud service come with built-in redundancy, ensuring your data is safer and more accessible.
4. Speedy Deployment
Our environment offers pre-configured templates or images (also known as “one-click installs”) for LAMP stacks. This means you can spin up a fully functional server with Linux, Apache, MySQL, and PHP in a matter of minutes rather than manually installing each component.
This stack has become a go-to solution for many developers and organisations because it’s reliable, well-supported, and relatively easy to deploy. In this guide, we’ll walk you through deploying a LAMP stack in the cloud, discuss why this approach is so beneficial, and provide practical examples to illustrate key points.
So let’s get into it!
Step-by-Step Guide to Deploying a LAMP Stack in the Cloud
Now we’re going to go through each step of the configuration for our LAMP stack.
First, we need to open our UKHost4u cloud solutions platform and click the Create New Environment button.
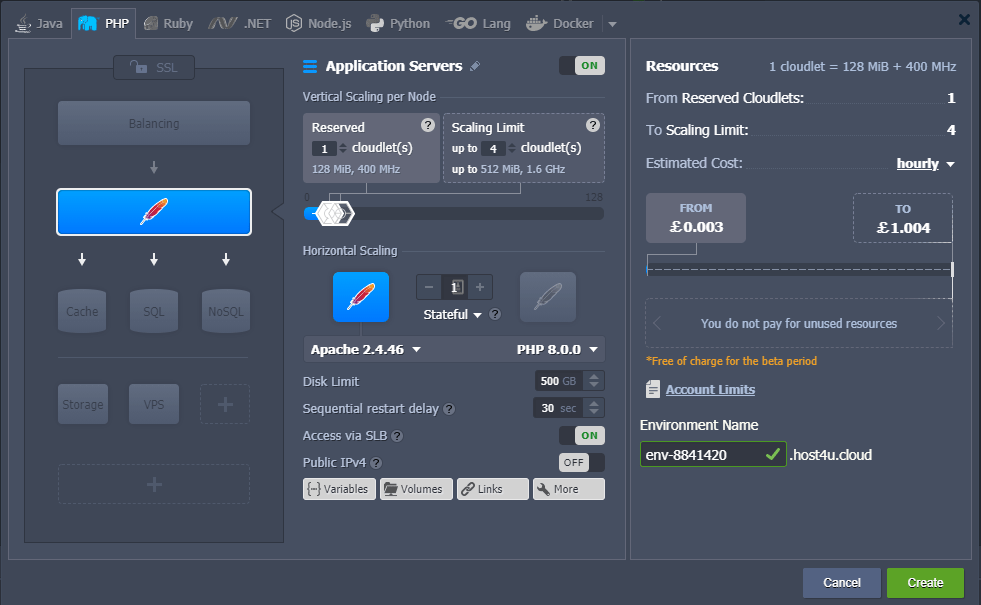
Here we have our environment builder tool. This is where we will be doing all of the configurations for our LAMP stack.
Now we need to select the type of environment we’ll be building. Since our environment uses PHP as the programming language, we need to select the PHP option.
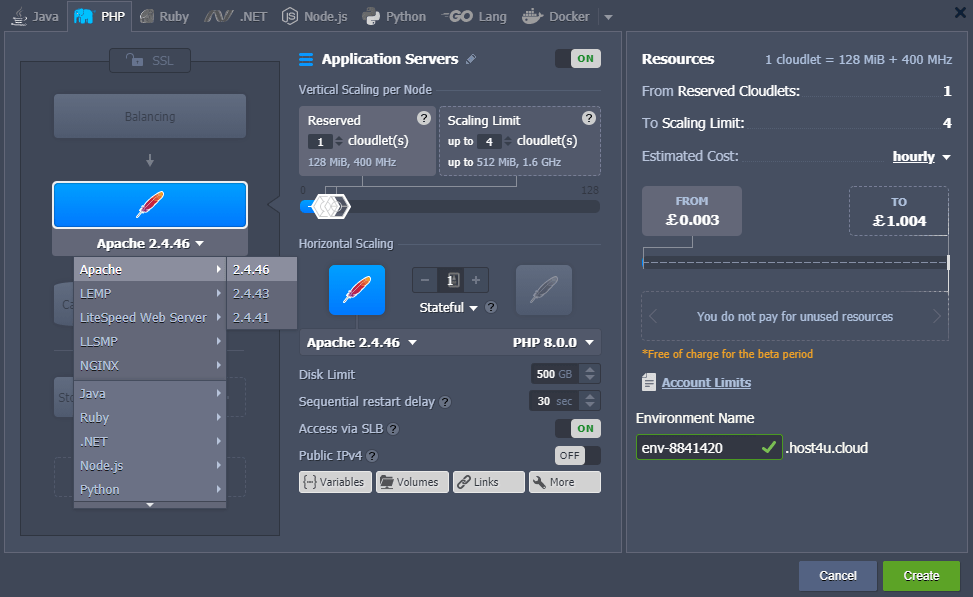
Web Server
The first thing we need to configure is our web server. In this case, we will be using Apache.
As you can see, it’s already been enabled by default, but if you need to use a different web server just pick the one you want from the drop-down menu.
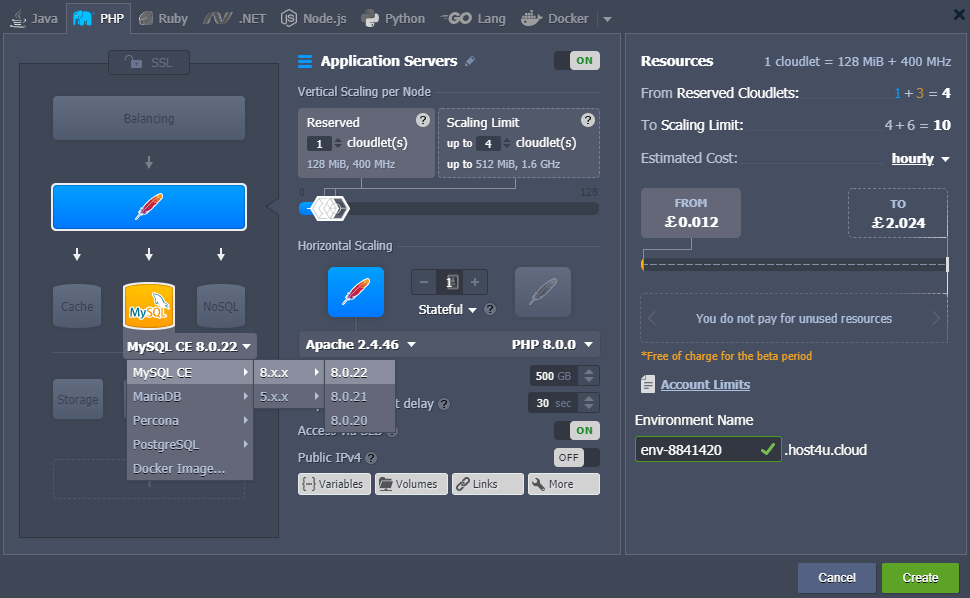
Database Server
Next up is the database server.
So navigate to the MySQL section, and choose the database server you need. As this is a LAMP stack, we will be using MySQL community edition.
Additional Recommendations for a Production Environment
And with that, the basic setup for our LAMP stack is finished!
Before creating the environment however, you can configure some additional options if you wish.
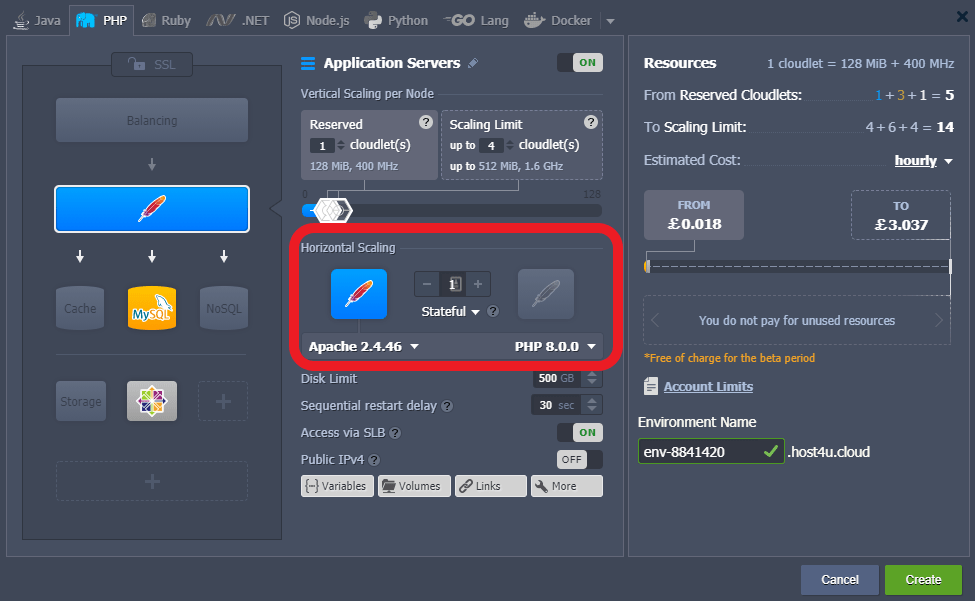
Under Application Servers, we can configure vertical scaling for our LAMP stack.
Essentially, this means dynamically adding more power to the server at any time, if resource usage is very high.
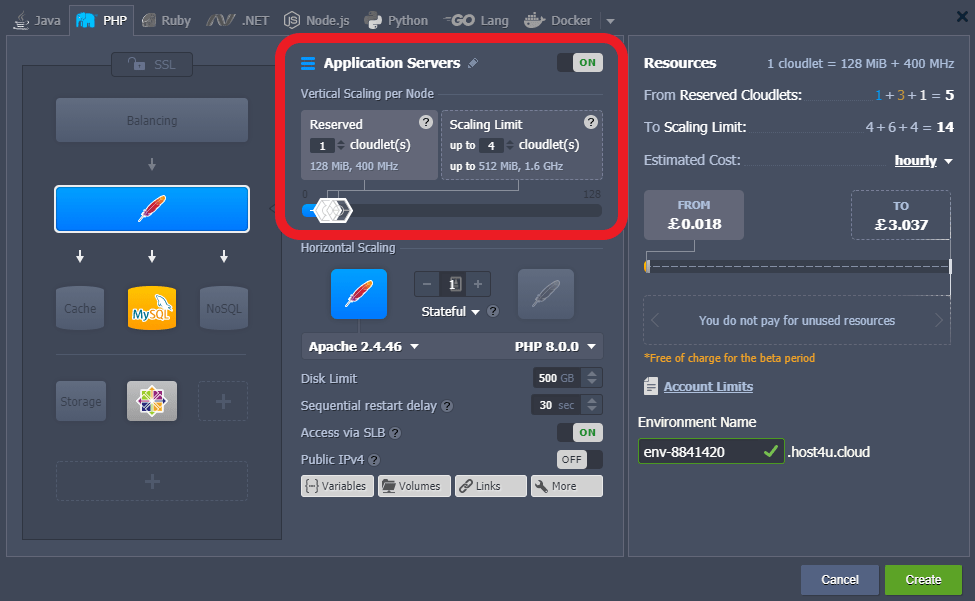
Below this, we can configure horizontal scaling, which means dynamically adding more nodes to the cluster, so that it’s able to process a higher number of requests when your server experiences traffic spikes.
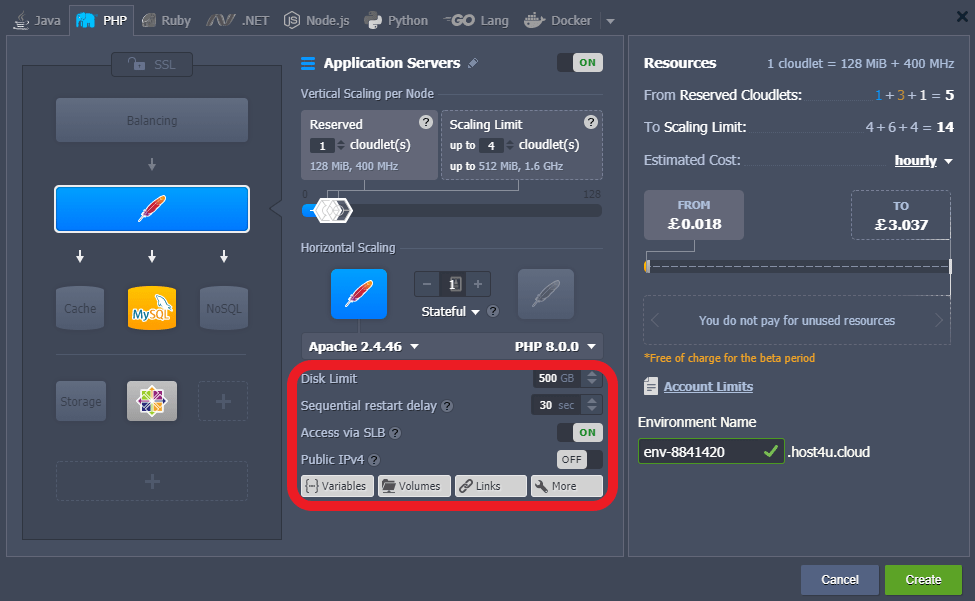
Below that we have the final configuration settings that we can update.
Here we can set things like our disk limit, Public IP address, and storage volumes.
Testing Your LAMP Server
After the server configuration is complete, verify that everything is working correctly:
- Apache Test:
- Open a web browser and enter your server’s domain or IP address.
- You should see the default Apache welcome page (or a similar test page).
- PHP Test:
- Create a simple php.info page to test your PHP.
- For code examples see: https://www.php.net/manual/en/function.phpinfo.php
- Visit
http://your-domain-or-ip/info.phpin your browser. - A page displaying your server’s PHP configuration should appear if PHP is correctly installed.
- MySQL Test:
- Log into MySQL from the command line using CLI on the MySQL environment.
- Run:
mysql -u root -p - Create a test database and table to ensure MySQL commands are functioning.
Other considerations
Deploying a LAMP stack is the first step. For a fully production-ready environment, you should also consider:
- Performance Tuning
- Optimise Apache and MySQL settings based on your traffic and resource usage.
- Implement caching mechanisms like OPcache for PHP, Varnish or Redis to improve performance.
- Consider using a content delivery network (CDN) for globally distributed content, which is a single click addon within the platform.
- Load Balancing
- When your traffic grows beyond a single server’s capacity, our platform offers a simple way to add a load balancer and scale.
- Distribute requests across multiple servers, each running its own LAMP stack.
- Backups and Monitoring
- Automate regular backups of your database and important files which can be done within the addon’s section.
- Monitor your server’s CPU, RAM usage, disk space, and network performance within the cloud enviroment.
- Set up alerts so you’re notified of unusual spikes or errors.
Finishing
Deploying a LAMP stack in the cloud can drastically simplify the process of hosting web applications, giving you the flexibility to scale and optimise resources without the hassle of managing hardware. Whether you’re creating a personal blog, launching a start-up website, or deploying enterprise-level applications, a cloud-based LAMP environment provides a proven, cost-effective, and secure foundation.
By following the steps outlined—choosing a suitable cloud provider, spinning up a server instance, installing or selecting a pre-configured LAMP image, configuring security, and testing your setup—you can quickly bring your website or application online. With additional security hardening, performance tuning, and maintenance routines, your cloud-based LAMP stack can become a powerful and reliable backbone for any online project.
