Search Knowledge Base by Keyword
How To Set Backup Configuration In WHM
Web Hosting Manager is a control dashboard that gives the access to the users to manage multiple cPanel websites.
WHM allows you to set automated backups for hosting accounts residing on your server, which can be incredibly useful when something goes wrong.
Below are the steps to the backup configuration in WHM-
- Login to the WHM control panel with valid credentials
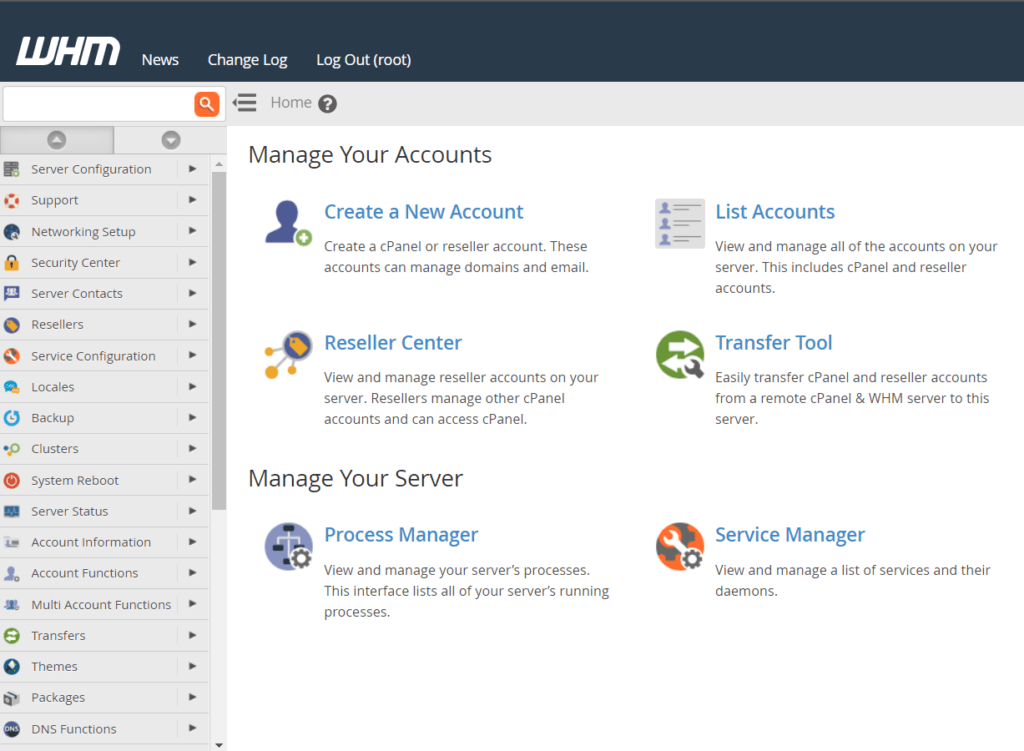
2. Navigate to the Backup Configuration option.
3. Users will now be presented with the backup configuration screen where you can configure the backup schedules for your server.
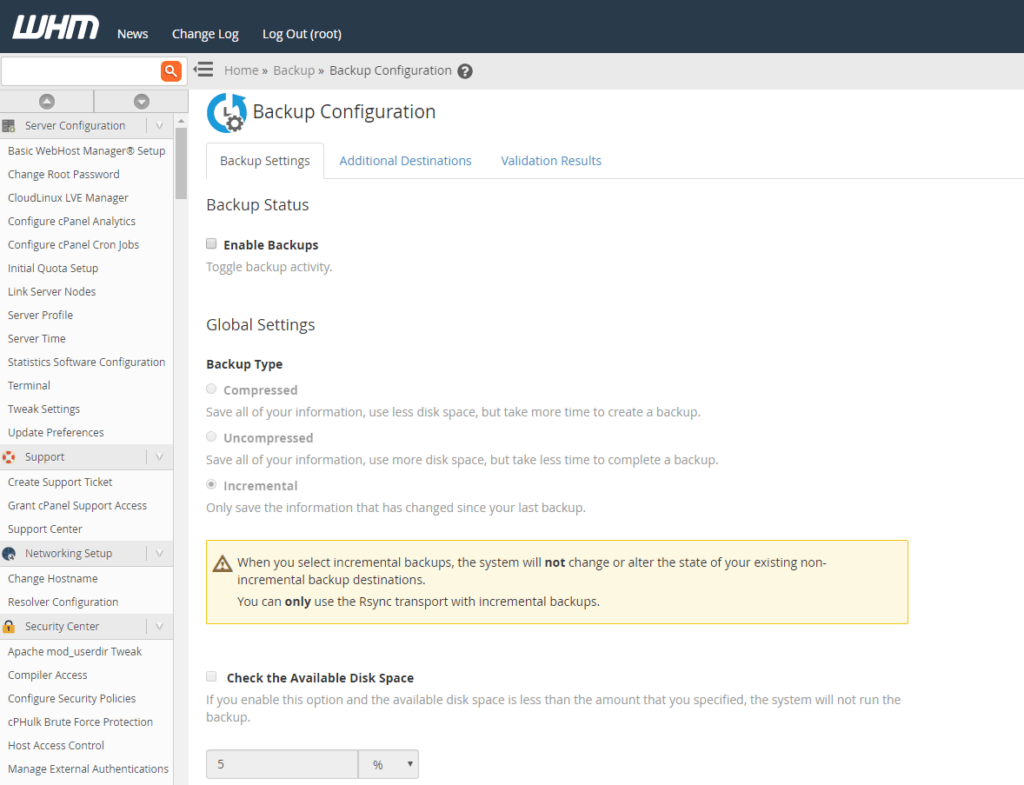
4. To enable backups, just click the tick box for Enable Backups.
5. Users can scroll down to Global Settings and choose the Backup Type you’d like. In most cases, you can choose the Incremental option.
6. Below this, users can also configure optional settings for checking available disk space, setting Maximum Destination Backup Timeout, and Maximum Backup Restoration Timeout.
Scheduling and Retention
Now scroll down to Scheduling and Retention where you can configure how often the backups will run, and how long the server will hold the backups.
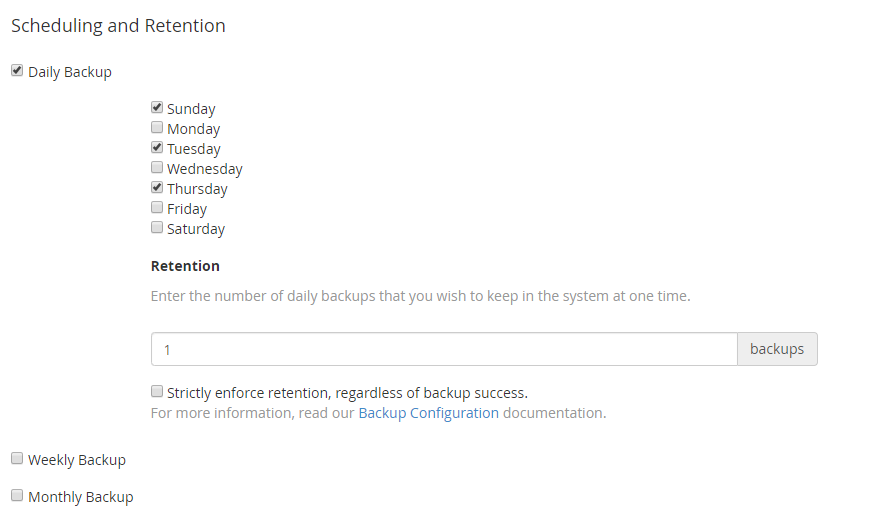
Choose whichever schedule and retention as you wish, keeping in mind your server’s available storage space.
Files
Next, scroll down to the Files section to configure which files, directories, and user accounts should be backed up.
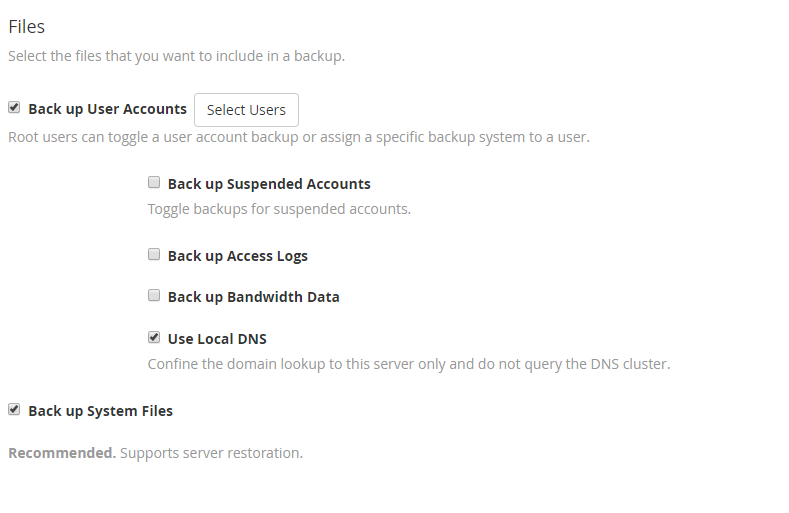
Here you can choose to back up specific user accounts as well as access logs, bandwidth data, Local DNS and system files.
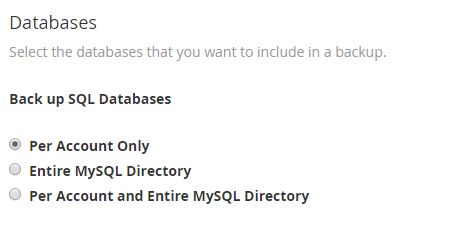
Databases
Now you can scroll down to the Databases section where you can choose what databases should be backed up.
Once you’ve made your choice, scroll down to the Configure the Backup Directory section.
Backup Location
In this final section, we can configure where the backups should be stored on the server.
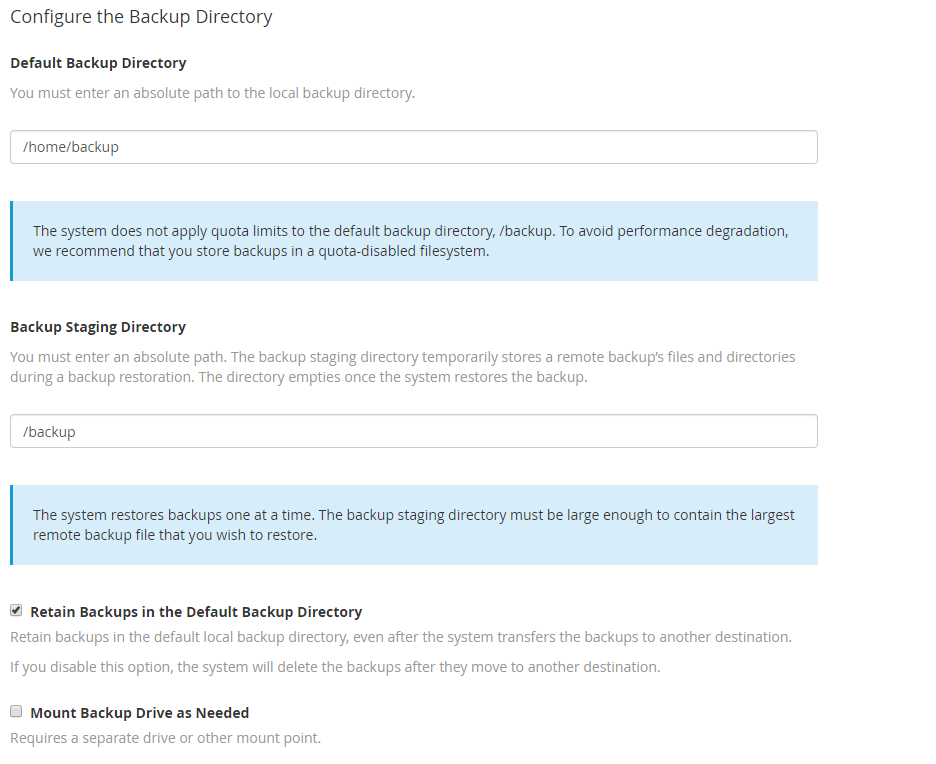
First choose the default backup directory, where the backups will be stored by default.
Then choose the backup staging directory, where remote backups are temporarily stored during a backup restoration.
Now you can choose whether to retain the backups in the default backup directory, as well as whether you’d like to mount a separate backup drive.
Finally, scroll down and click Save Configuration to finish applying the backup configuration.
