How to Setup a Remote Redis 6 Server with Drupal 8

This comprehensive guide will walk you through the process of deploying a remote Redis 6 server, installing the essential Drupal Plugin for Redis, and configuring it to utilize password authentication for enhanced security. By following these steps, you can significantly boost the performance and reliability of your Drupal 8 website.
Additionally, we will explore how to add a failover option to ensure that your Drupal site remains operational in the event of a Redis server failure. This failover mechanism is crucial for maintaining high availability and avoiding service disruptions.
At our company, we have observed a growing need to explore performance improvement options for clients hosting their Drupal sites on our Cloud Solutions. One effective strategy is to integrate a Redis 6 server into the deployment environment. For more detailed guidance on this setup, you can refer to our detailed guide on Drupal performance optimization. Furthermore, for a broader understanding of Redis capabilities, you can visit the official Redis documentation.
Installing Redis node
The first stage is to deploy the Redis node into your existing infrastructure build, through the Cloud Solutions environment builder tool:
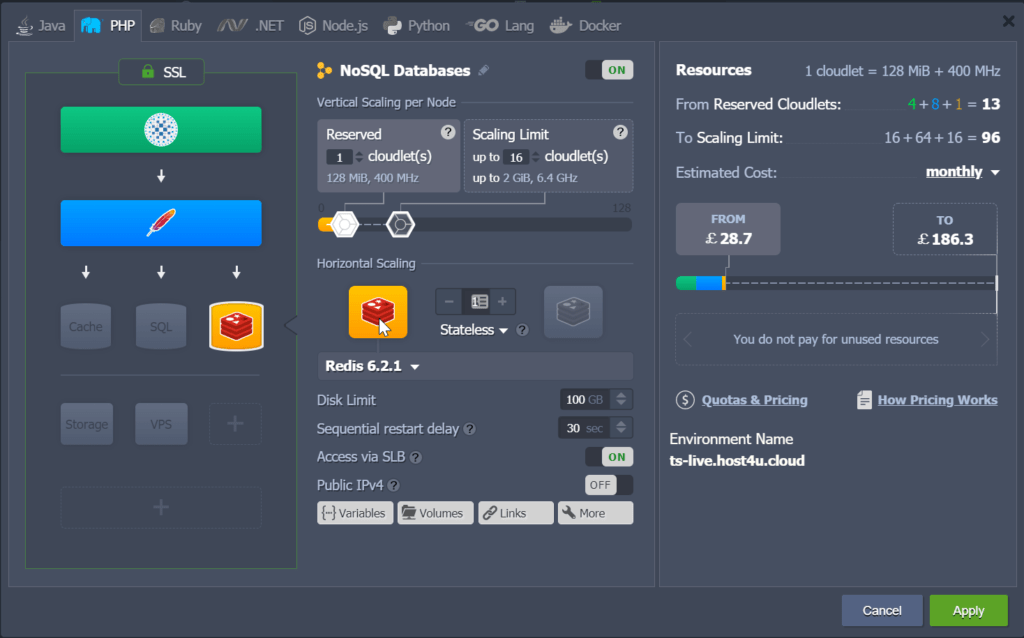
At this point, all you need to do is enable the Redis service, select the number of Cloudlets you wish to allow, and deploy it.
With UKHost4u Cloud solutions, Redis is a one click install along with the Load Balancer, Web Server and any other components needed. If you are not using our cloud solution, you would need to deploy your own setup at this stage.
Once the Redis server is deployed, we now need to configure the web server to support this (in this case we’re using Apache).
The first thing we are going to do is modify the php.ini to add support for Redis extension; normally the php.ini would be located under /etc/php.ini but this could vary based on your web server technology:
I am going to at this stage change:
;extension=redis.so
To
extension=redis.so
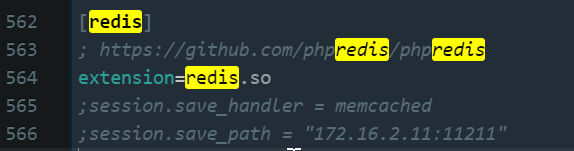
I will then save this change and restart Apache.
This will give us support for PHPRedis, and will be used for our integration of Drupal and Redis Server.
At this point we have completed the server side configuration, which has included installing Redis and adjusting the web server to support it in the php.ini.
The next stage is going to be mainly focused on the Drupal side of the installation.
Installing Redis Drupal Module
Next we need to install the module for Redis and enable it within Drupal. This can be done using a number of methods, such as Composer, Drush, etc, but for this example we will do it using the Web GUI.
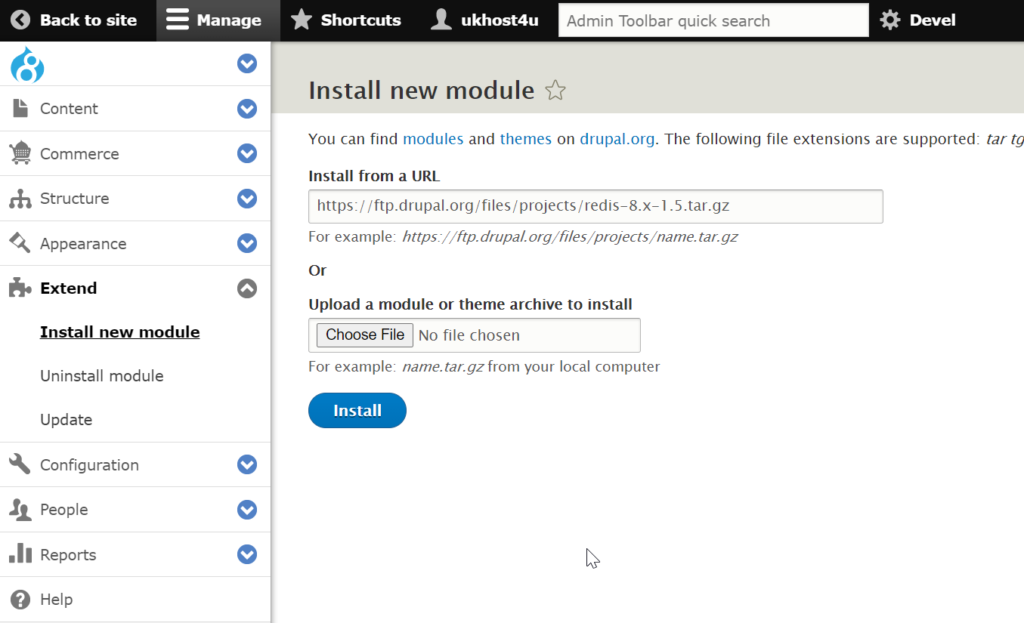
You will first of all need to locate the latest copy of the extension from Drupal direct:
https://www.drupal.org/project/redis
Once you have this, navigate to under the admin section and select -> Extend -> Install new module.
You can also install this using composer and the following command:
composer require 'drupal/redis:^1.5'
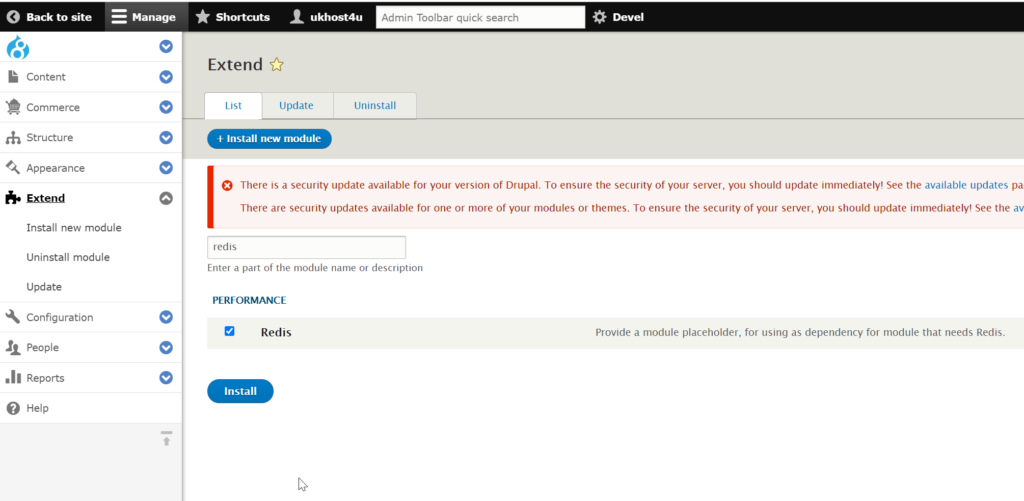
The next stage is to enable the module.
To do this we go to Admin -> Extend and search for Redis. Once you find it, tick the box to enable it and click install.
At this stage we have installed Redis into drupal but have not actually configured it. To do the configuration for Drupal we need to add some lines into the settings.php file which should be located under /sites/default/settings.php
To understand this better, we need to understand some of the details of our Redis deployment.
As we used a one click build to deploy Redis, we are going to use the details from the welcome email which includes the IP and the password to be used. If you manually installed Redis you should have already configured this.
For this example, let use:
- IP: 172.1.2.3
- Password: Pass123
For this part we are going to offer two solutions.
Solution #1
First, a very simple config for Redis to be able to connect. This is enough to be able to offer Drupal with Redis, but as we may have a situation where the redis server could technically fail we also have a solution which will test for a failure, and if detected will default back to using the Drupal Cache and stop the site going offline.
$settings['redis.connection']['interface'] = 'PhpRedis';
$settings['cache']['default'] = 'cache.backend.redis';
$settings['redis.connection']['host'] = '172.1.2.3';
$settings['redis.connection']['port'] = '6379';
$settings['redis.connection']['password'] = "Pass123";
$settings['queue_default'] = 'queue.redis';
$settings['container_yamls'][] = 'modules/contrib/redis/redis.services.yml';
$class_loader->addPsr4('Drupal\redis\', 'modules/contrib/redis/src');
In this example you need to set the host / port and password. The rest of the configuration does not need any other changes.
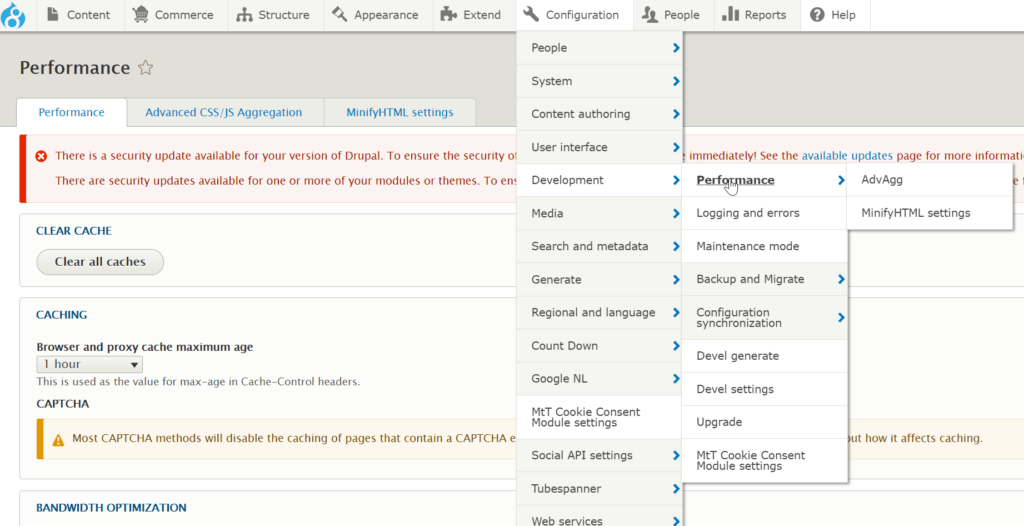
It is also helpful at this point to clean the cache which can also be done under: Admin -> System -> Development -> Performance
Once this is setup and saved, you can check if Redis is running correctly under in Drupal under: Admin -> Reports -> Redis

Solution #2
The final option we will discuss is using a little extra code to confirm the Redis server is live before enabling it as the Drupal cache.
We do this using a quick test script which will connect to the redis remote node and issue a ping command. If Redis resounds correctly with Pong, it will enable the Redis cache and remove the Drupal cache. On the other hand if this test fails it will remove Redis settings and restore Drupal cache to limit any outages.
/**
Redis Configuration.
*/
try {
   $redis = new Redis();
   $redis->connect('172.1.2.3', 6379);
   if ($redis->IsConnected()) {
       $redis->auth('Pass123');
       $response = $redis->ping();
       if ($response) {
           $settings['redis.connection']['interface'] = 'PhpRedis';
           $settings['cache']['default'] = 'cache.backend.redis';
           $settings['redis.connection']['host'] = '172.1.2.3';
           $settings['redis.connection']['port'] = '6379';
           $settings['redis.connection']['password'] = "Pass123";
           $settings['queue_default'] = 'queue.redis';
           $settings['container_yamls'][] = 'modules/contrib/redis/redis.services.yml';
           $class_loader->addPsr4('Drupal\redis\', 'modules/contrib/redis/src');
       }
   }
 }catch(Exception $e) {
 }
We hope that you have found this guide helpful in setting up a remote Redis 6 server with Drupal 8. Throughout our research, we discovered that the available documentation for both Drupal and Redis can be somewhat limited and fragmented. This motivated us to create a more detailed and comprehensive resource.
By following the steps outlined in this guide, you should now have a robust setup that enhances both the performance and reliability of your Drupal site. Integrating Redis not only significantly boosts your site’s speed but also adds a failover mechanism to ensure continuous operation in case of server issues, providing greater stability and uptime.
For additional resources and updates, make sure to visit Drupal resources page for expert tips and insights. If you’re looking for more advanced Redis configurations and best practices, the Redis community forums offer valuable insights from the Redis user community.
For further assistance or personalized support, feel free to reach out to UKHost4u’s team via live chat, or you can easily open a support ticket through our ticket system. We’re always here to help!