The ultimate guide to Tomcat deployments
Deploy a Tomcat Server with UKhost4u Cloud Solutions Platform
Apache Tomcat is one of the most used and deployed Java servers when it comes to running web applications. As such we have compiled all you need to know to build a Tomcat server, install Tomcat latest version, configure this Java web server and its load balancing. We’ll also cover how to deploy applications and improve Tomcat security using the UKhost4u Cloud Platform.
To help you navigate across our guide, here’s a short outline:
- Create Tomcat Server
- Change Tomcat Version
- Tomcat Clustering and Scaling
- Deploy Application to Tomcat Environment
- Tomcat Configurations
Creating Tomcat Server
Creating and deploying a Tomcat server is quite simple with the UKHost4u Cloud Platform. Below are the steps for Tomcat installation:
1. Register and log into your dashboard.
PLEASE NOTE: Any registrations comes with a 14-Day FREE trial period. Find here how to register your account.
2. Once logged in, click on the “New Environment” button.
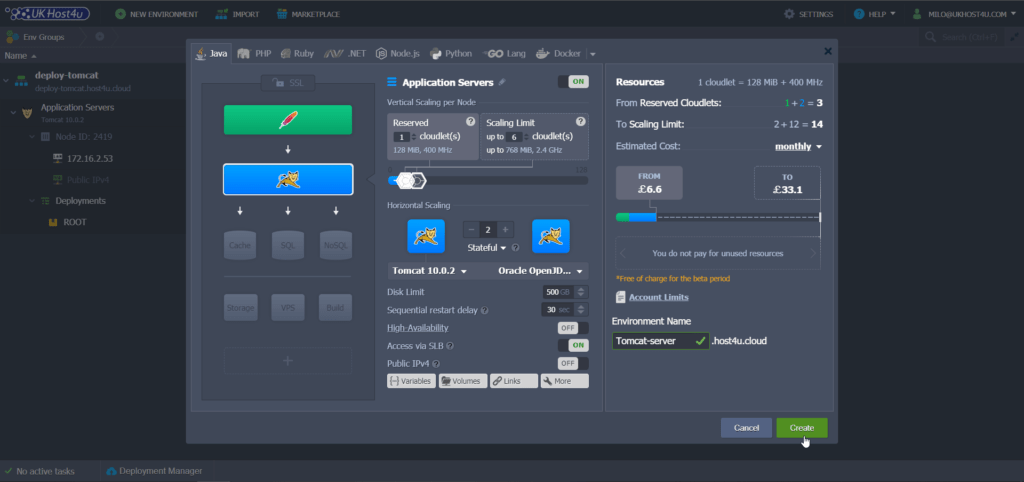
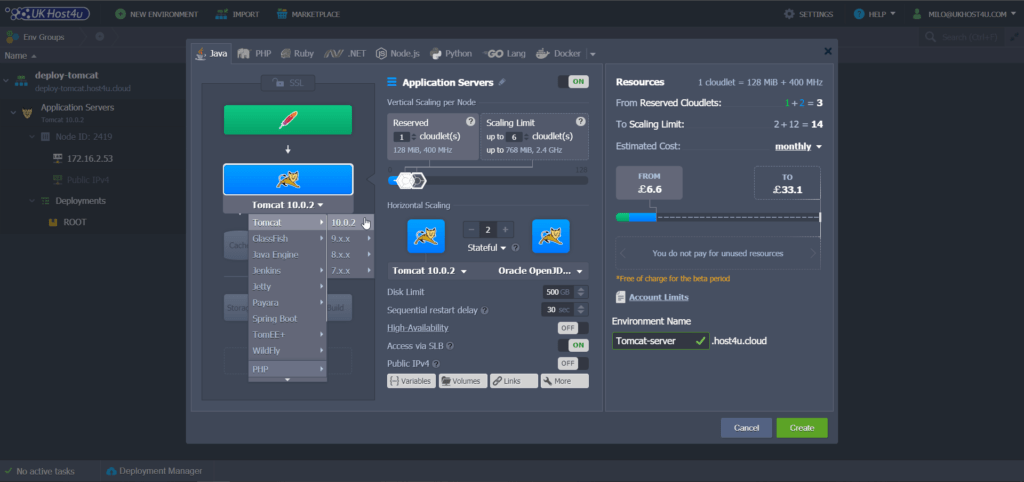
3. Choose the Tomcat version for your application server by opening the drop down button (see below). The cloud platform allows you to use Apache Tomcat versions starting from 7 up to the latest Tomcat 10 depending on your application requirements.
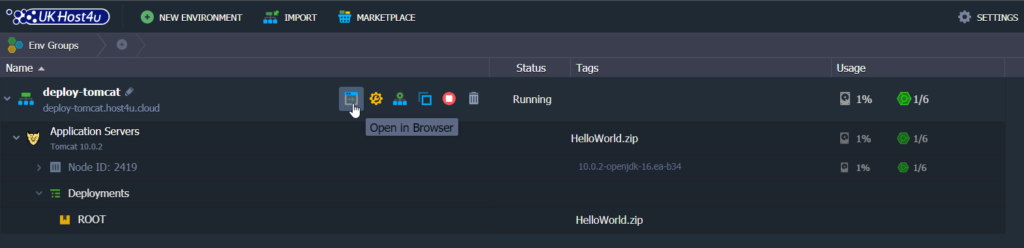
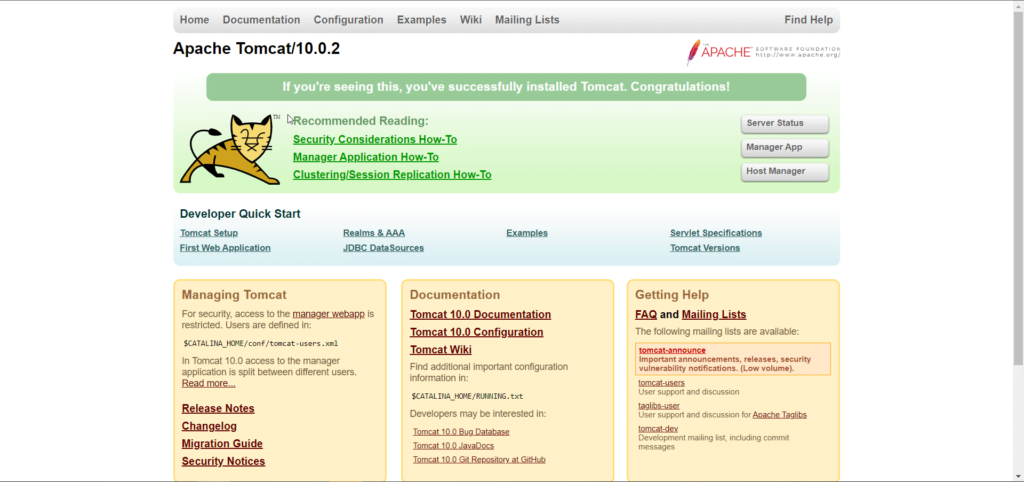
Once your environment is created, you will find it directly in your dashboard your Tomcat application server, ready to use. If you want to check if Tomcat is running, click on the Open in browser button.
If your environment has been successfully configured, opening it in your browser should display the below page. If you have trouble installing your environment, don’t forget to contact our Support Team.
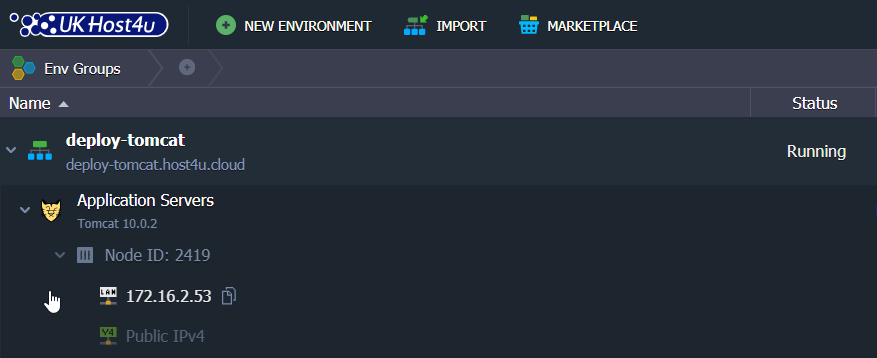
Now that your application server is operating in a separate container (or node), which is an isolated virtualized instance, provisioned for a software stack. You can expand your environment’s info by clicking on the instance displaying its own private IP and unique DNS record.
Changing Tomcat Version
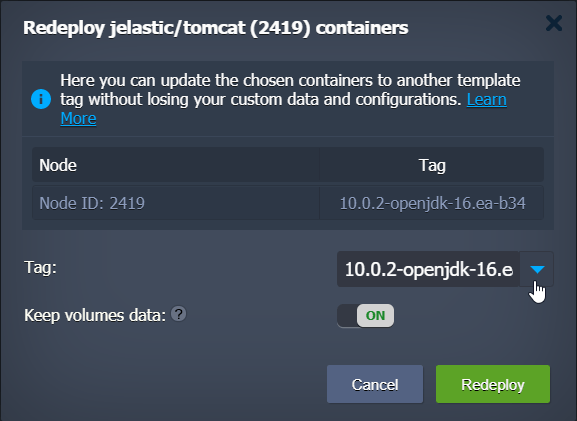
If for any reason you need to change the version of your Tomcat installed server, this is possible at any time, and without losing any of your data or configurations.
1. Just click on the “Redeploy containers” button next to the Apache Tomcat server node. See below.

2. Select the new Tomcat version using the dropdown list and click on “Redeploy“.
Tomcat Clustering and Scaling
Our Cloud Platform can automatically scale your applications, both vertically and horizontally. Setting this up on top of a Tomcat cluster will make this hosting truly flexible.
Tomcat Automatic Vertical Scaling
You can easily scale your Tomcat environment vertically thanks to our platform that has the ability to dynamically change the amount of resources available (RAM and CPU), according to its current demands. This said, you will never pay for unused resources or pay for a server limit you will never reach. It will help you save time and extra tasks adjusting architectural changes, for example.
PLEASE NOTE: You can check our dedicated article here Pay-Per-Use Method.
How to scale your Tomcat environment
To set up automatic resource scaling for your Tomcat server:
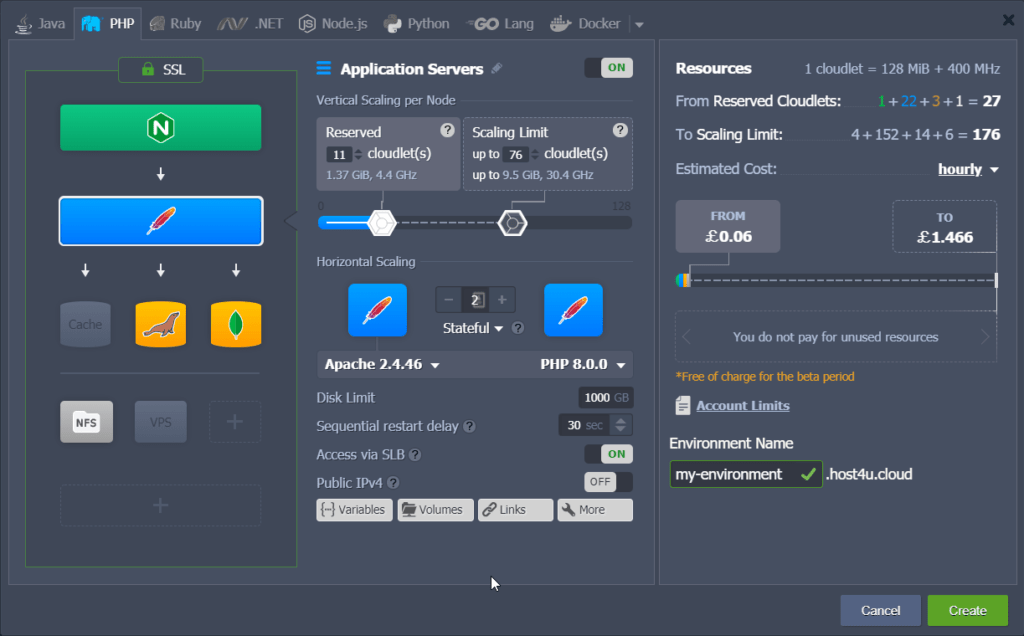
1. Open the environment topology wizard.
2. Select the upper scaling limit of cloudlets with the toggle bar ( a Cloudlet equals to 128 MB and 400 MHz).
This means your application will work within these limits. If the environment’s consumption and the load decreases, your resources will be reduced as a result. If the consumption increases then allocated resources will adjust automatically to the amount required.
If you need more information, please refer our automatic vertical scaling article.
Tomcat Horizontal Scaling
Manual Horizontal Scaling
1. If you need to adjust your Tomcat servers horizontally simply click on “Change environment topology”.
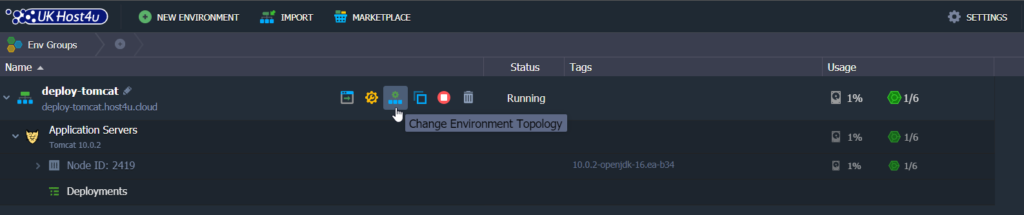
2. Press the “+” button in the wizard and add the required number of instances.
PLEASE NOTE: You can add a maximum of 16 nodes within a single environment layer of the same-type servers.

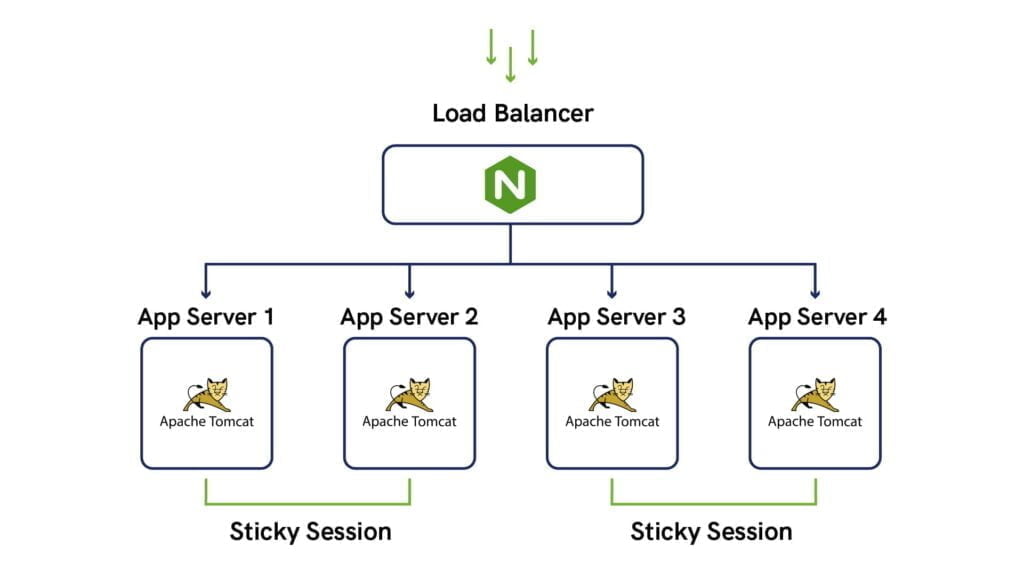
When adding extra servers, Apache Tomcat load balancing is enabled automatically. If you need further information about manual horizontal scaling please check our article here.
Automatic Horizontal Scaling
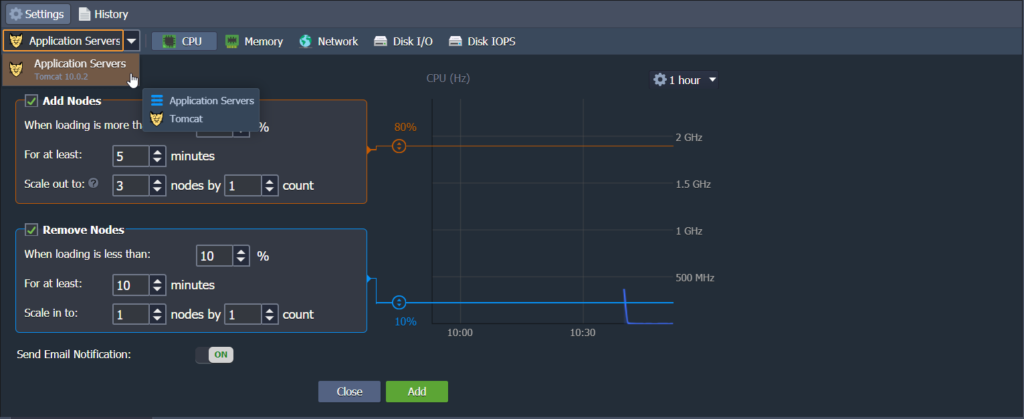
You can also automatically scale your Tomcat environment. This can be implemented using adjustable triggers, which help to monitor any changes in your application’s load and increase or decrease the number of nodes accordingly.
If you want to configure a trigger for your automatic horizontal scaling:
1. Click on the Settings button of the environment.
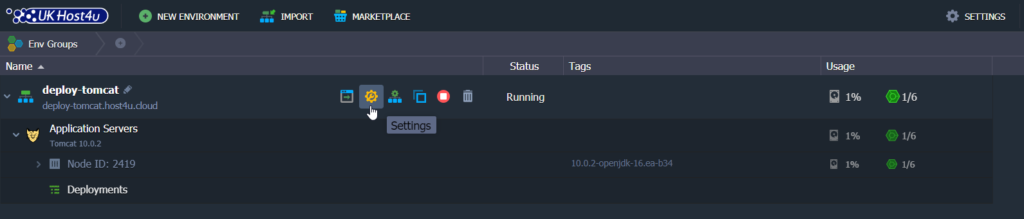
2. Click on the “Auto Horizontal Scaling” feature.
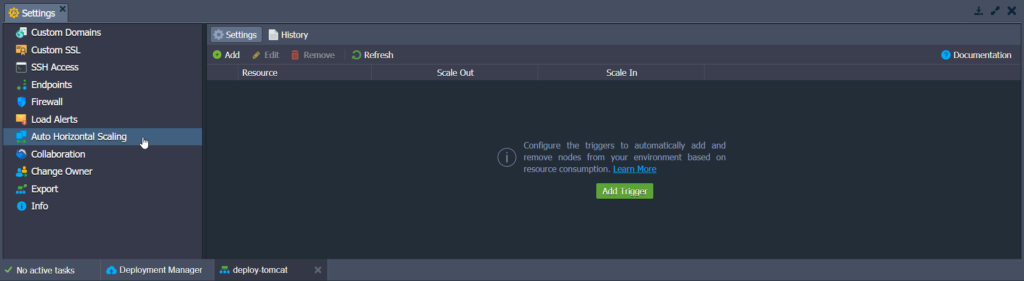
3. Click “Add” to configure the triggers for specific stacks and resources (CPU, RAM, Network, Disk) within your environment separately.
4. Once you’re happy with the settings and conditions of scaling, click “Add“.
PLEASE NOTE: You can find all the details about triggers and how to set them up in our Automatic Horizontal Scaling article.
Automatic Tomcat Clustering
To increase your application’s availability, you can rely on the embedded server clustering feature of UKhost4u Cloud Platform. It allows a replication of sessions between pairs of nodes and eliminates the necessity for additional software or Memcached usage.
With no need for configurations or extra development work, you can get multicast replication between pairs of Tomcat servers. And if one of the instances fails, the users who were on that instance are automatically moved to the other instance in the cluster.
In order to activate Tomcat clustering, simply click on the toggle button and turn on the “High-Availability” feature within your environment topology wizard. See below.

Deploying Applications into your Tomcat Environment
You’ll find several ways to deploy your applications into your Tomcat environment. However, the easiest and most common option is via the Deployment Manager Tool.
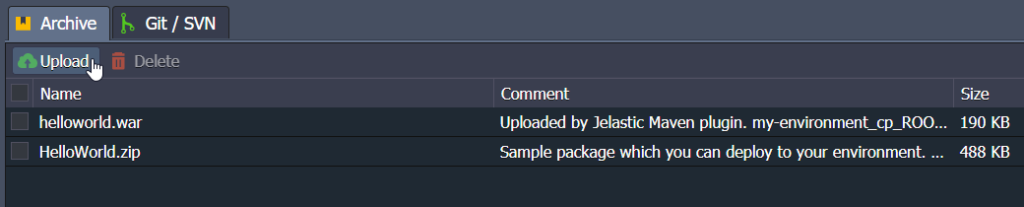
1. Open “Deployment Manager” at the bottom of your dashboard.
2. Click on the “Upload” button.
3. You can upload using Archive (local file or URL).
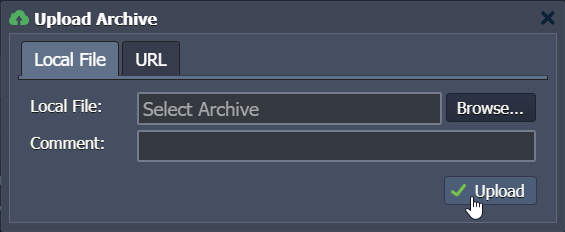
PLEASE NOTE: The Deployment Manager supports .WAR, .ZIP or .EAR formats.
4. Once your file has been uploaded you can select directly from the list and click the “Deploy to…” button.
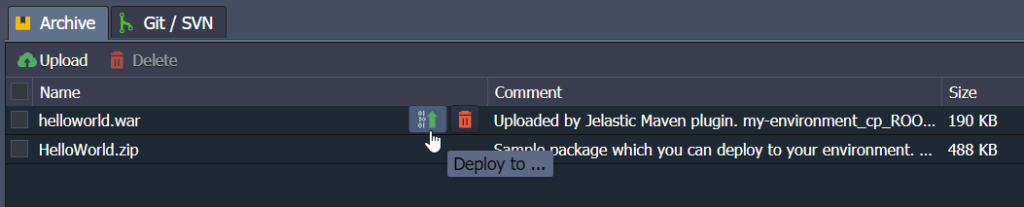
5. Choose the appropriate environment you want to deploy your application to, and specify the context (or leave the default ROOT value).
6. Finally, click “Deploy” to start deploying the application.
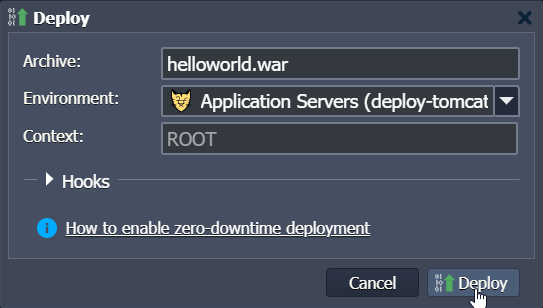
PLEASE NOTE: You can also add at this stage deployment hooks to execute your custom scripts before or after the application deployment.
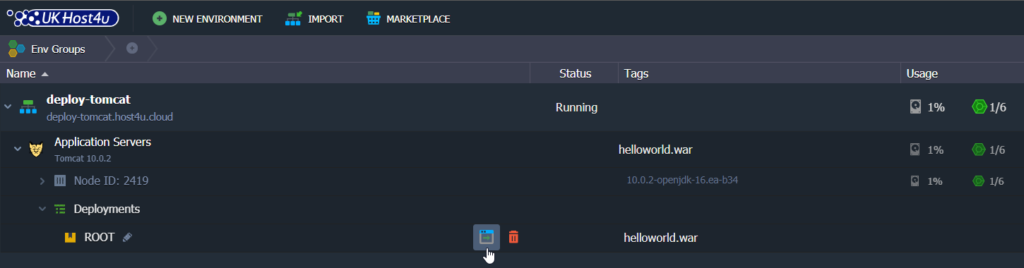
7. That’s it! You will see your project within deployments of the environment once the process has been completed.
If you need more options for deploying your application to Tomcat, for example, via Git/SVN using Maven build node, check our deployment manager guide.
Tomcat Configurations
We will see in this section how to optimize your work using a Tomcat server.
Environment Variables
To make your application more flexible, you can use environment variables instead of specifying the required values in your application code each time.
Ukhost4u Cloud Platform provides a number of Tomcat default environment variables for the most common stack data, and to make its management even more convenient you can add custom environment variables for your Tomcat node.
Configuration Files
Your Tomcat configuration files are available for editing directly from your dashboard.
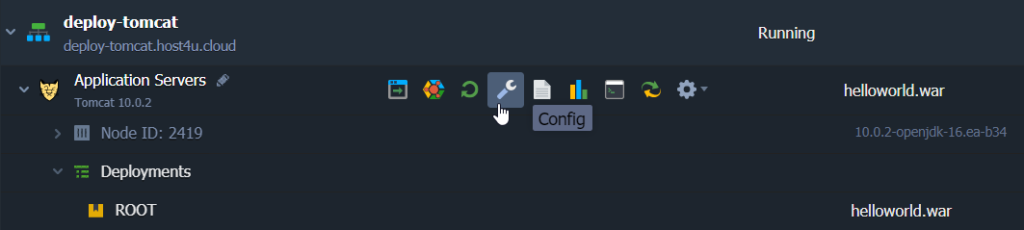
1. Click on the “Config” button.
2. Using the file manager, you can browse your files directory easily.
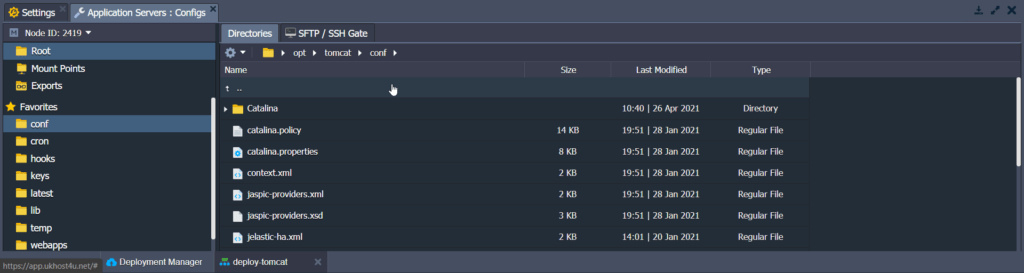
3. Use the table below to find names and paths to the core Apache Tomcat configuration files:
| Folder | File | Path |
|---|---|---|
| conf | catalina.policy catalina.properties context.xml jaspic-providers.xml jaspic-providers.xsd jelastic-ha.xml jelastic-ssl.xml logging.properties server.xml tomcat-env.sh tomcat-users.xml tomcat-users.xsd variables.conf web.xml | /opt/tomcat/conf |
| temp | /opt/tomcat/temp | |
| webapps | /opt/tomcat/webapps | |
| latest | /usr/java/latest | |
| lib | /opt/tomcat/lib | |
| cron | tomcat | /opt/tomcat/lib |
| keys | /opt/tomcat/lib |
If you have a question or you need our assistance, remember our support team is available 24/7.
Tomcat Security Settings
If you need to restrict access to the project deployed on your Tomcat server, you can:
- Set up “user authentication” and “deny access” to your web application for certain IP addresses.
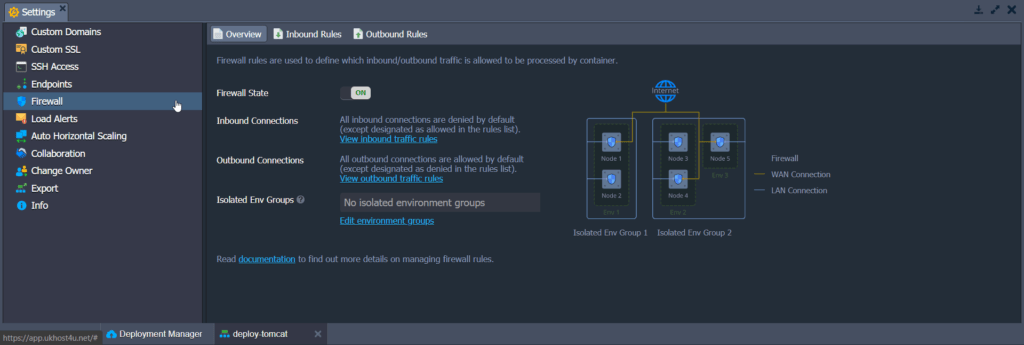
- Ensure the security of your applications using the “Container Firewall” feature. It lets control your nodes availability both from inside and outside of the platform.
To Conclude
As shown, the UKHost4u Cloud Platform makes Tomcat deployment and hosting incredibly simple, flexible, and scalable. Our cloud platform comes with predefined settings that automate day-to-day tasks, ensuring hassle-free management. At the same time, it offers the flexibility to fully customize your server for advanced configurations, making it perfect for both standard and complex needs.
Ready to experience it yourself? Deploy your Tomcat Cloud Environment with our 14-Day FREE trial and enjoy the benefits of a robust, turnkey hosting solution.
For further assistance, feel free to contact our support team via live chat or submit a support ticket for expert help.
What’s next?
About Milo Travers